
To set up a feed:
Subsections enable different types of data to be captured by the same submission, e.g. Premium and Claims.
Subsections apply to all new submissions within a feed. If a subsection is added or removed, the changes will only be present in newly created submissions.
Feed owners can view and edit the current subsections for a feed in its side panel. Subsections are ordered in the order they are created.
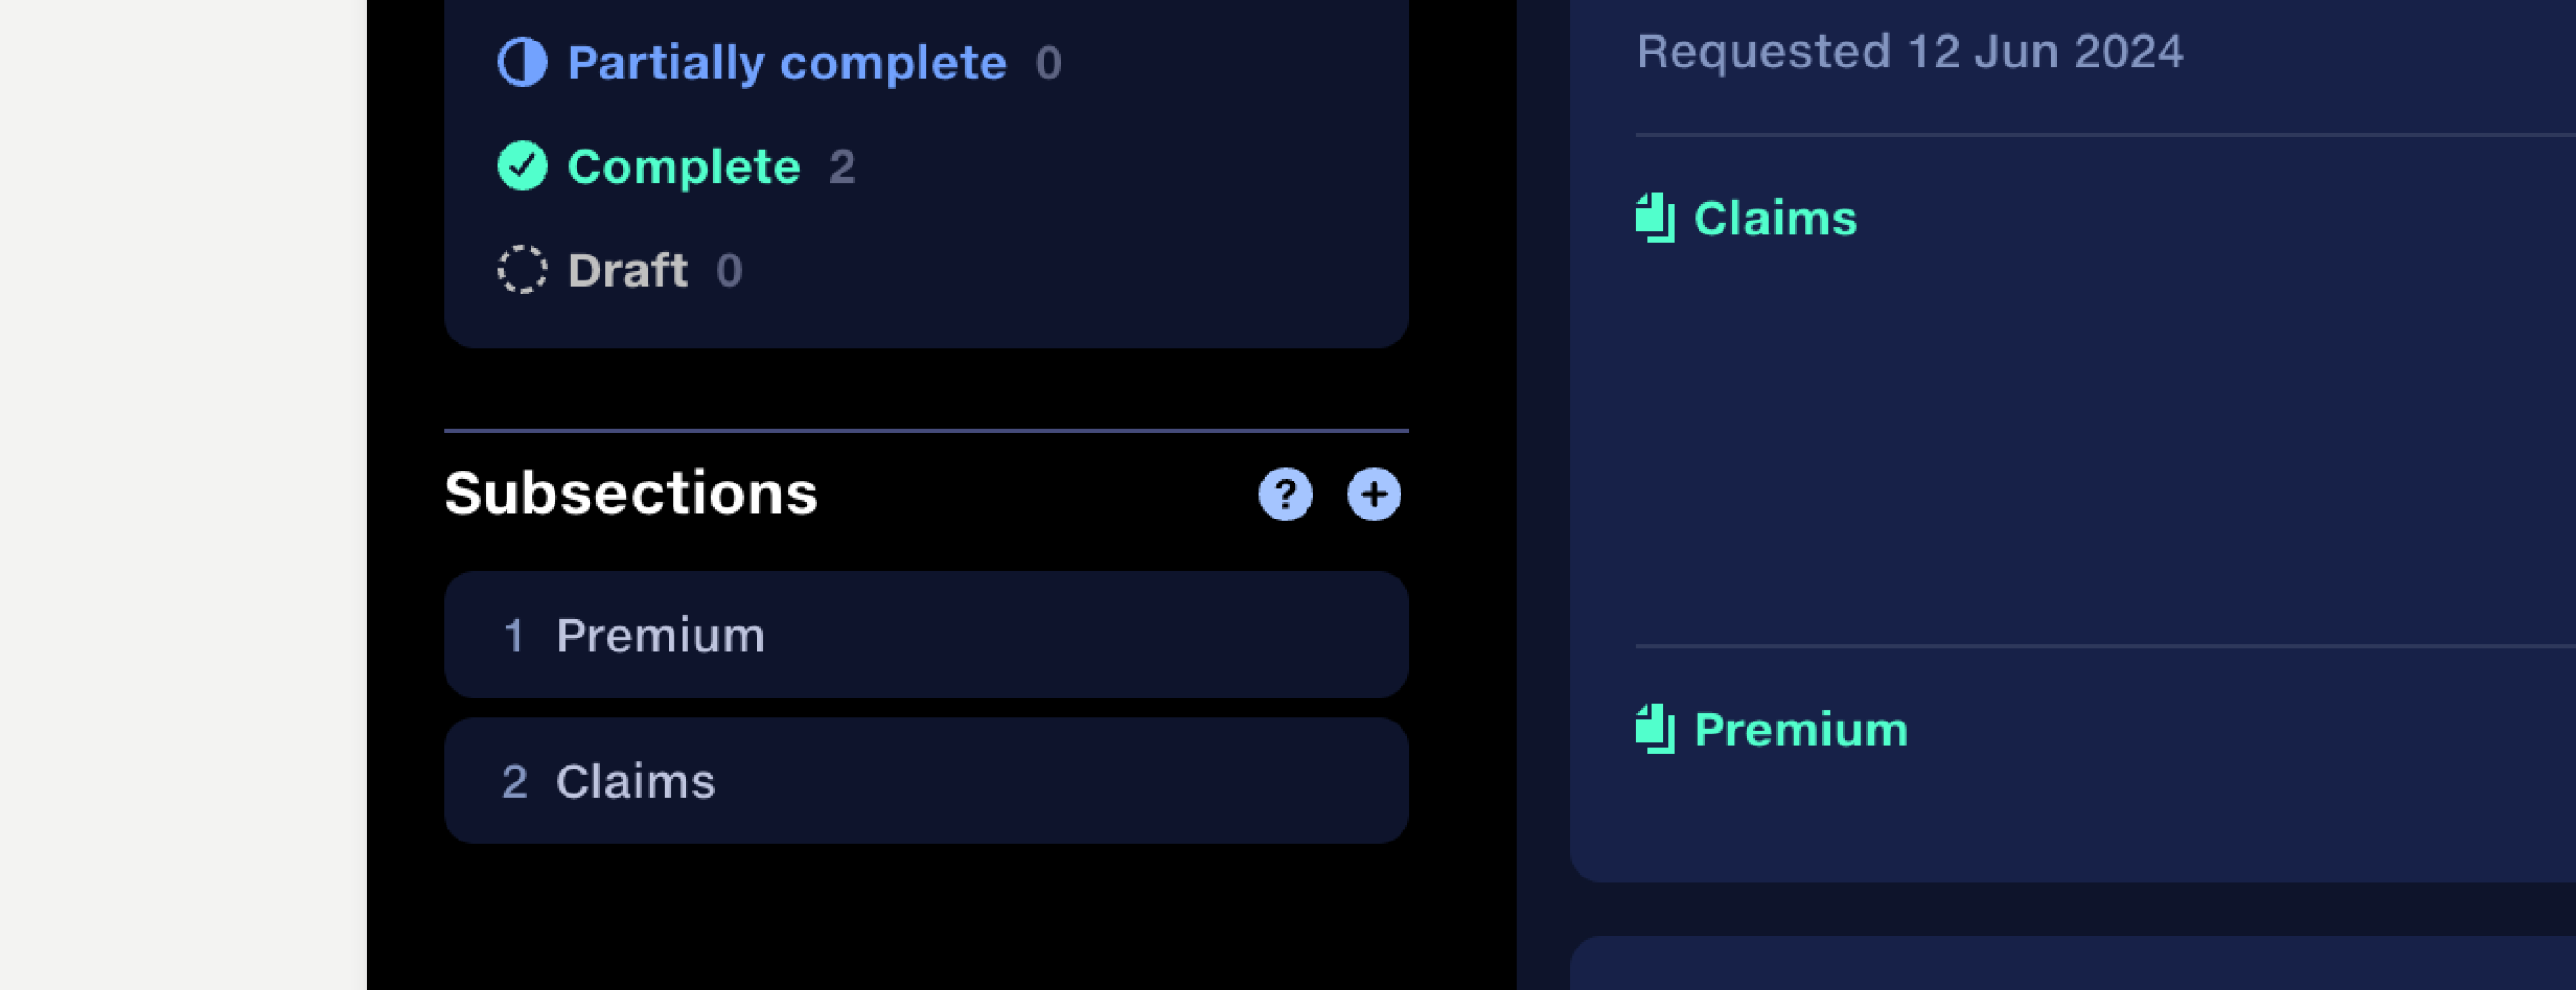
To add a subsection, click the ‘+’ button in the subsection part of the side panel.
To remove a subsection, click the ‘...’ button that appears when hovering over a subsection and select ‘Remove subsection’ from the context menu.
To rename a subsection, click the subsection name and edit it. The changes will be applied to all subsections in a feed, including those with data already submitted to them.
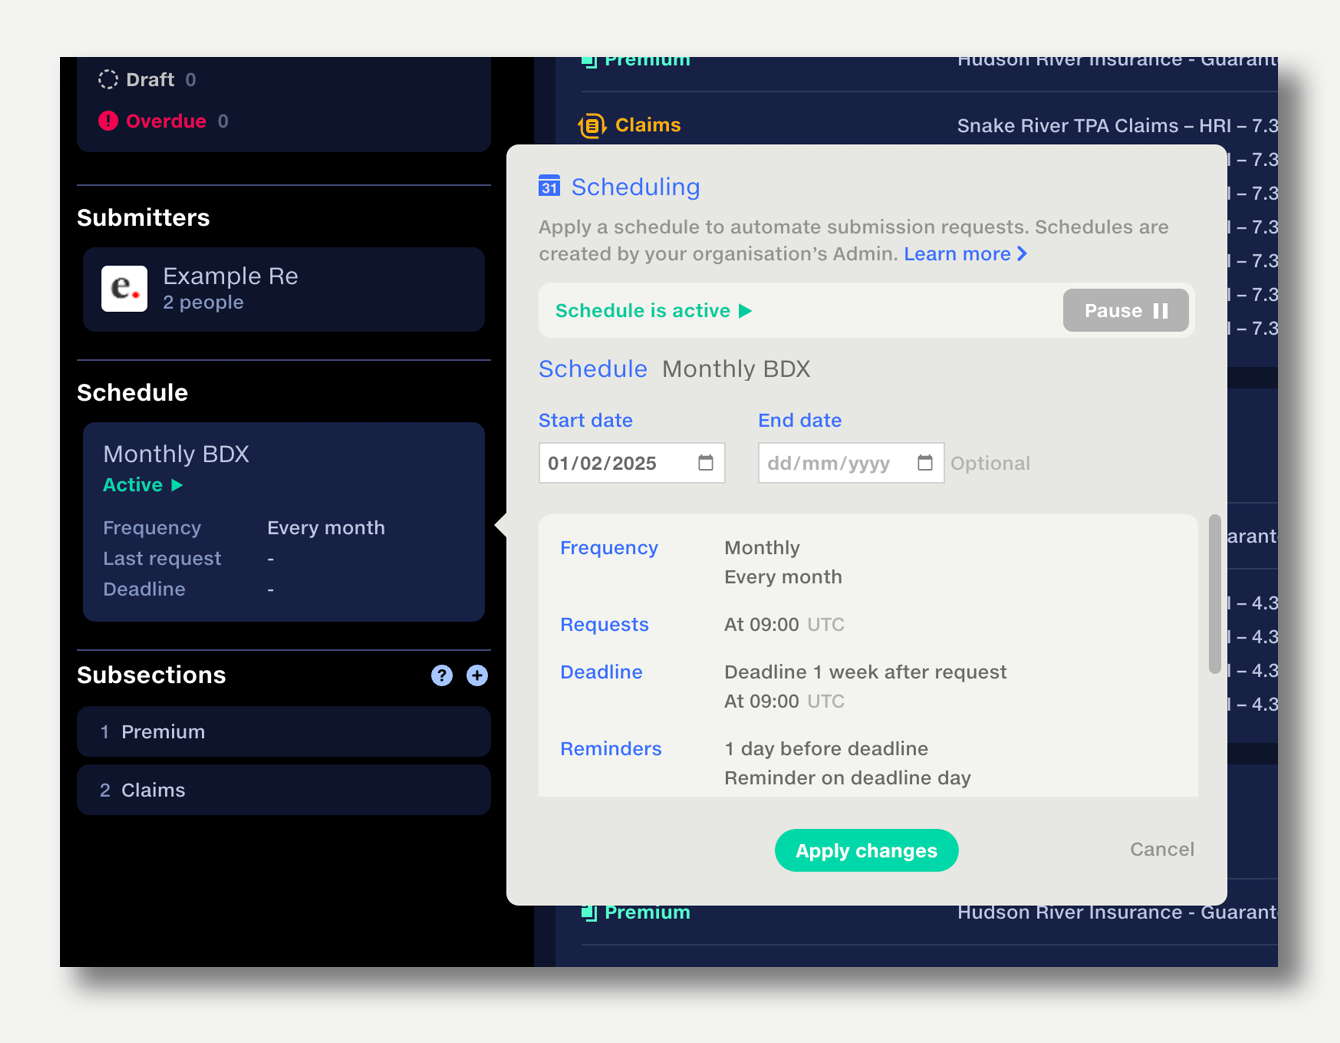
A schedule can be applied to a feed to automate the creation and requesting of submissions.
Schedules are created by Org Admins and can be applied by feed owners. Learn more.
Schedules are in beta.
Connect to a partner organisation to request data directly from them, or send data to them.
They'll be able to access a following feed in their own Quantemplate account.
Their following feed is connected to your leading feed, mirroring the data for both parties.
They have no access to your Quantemplate organisation or any data outside the mirrored feed.
Learn more about feeds.
To connect to a partner, click the top bar in a feed and follow the steps to add a partner.