
Admin tools allow users with an Admin role to manage members of their organisation, edit organisation details and view public API credentials. They are only available to users with an Admin role within their organisation.
To access the Admin tools, click the Admin tab in the main navigation bar.
Click the Organisation entry in the sidebar to view and edit organisation details, and see organisation Admins.
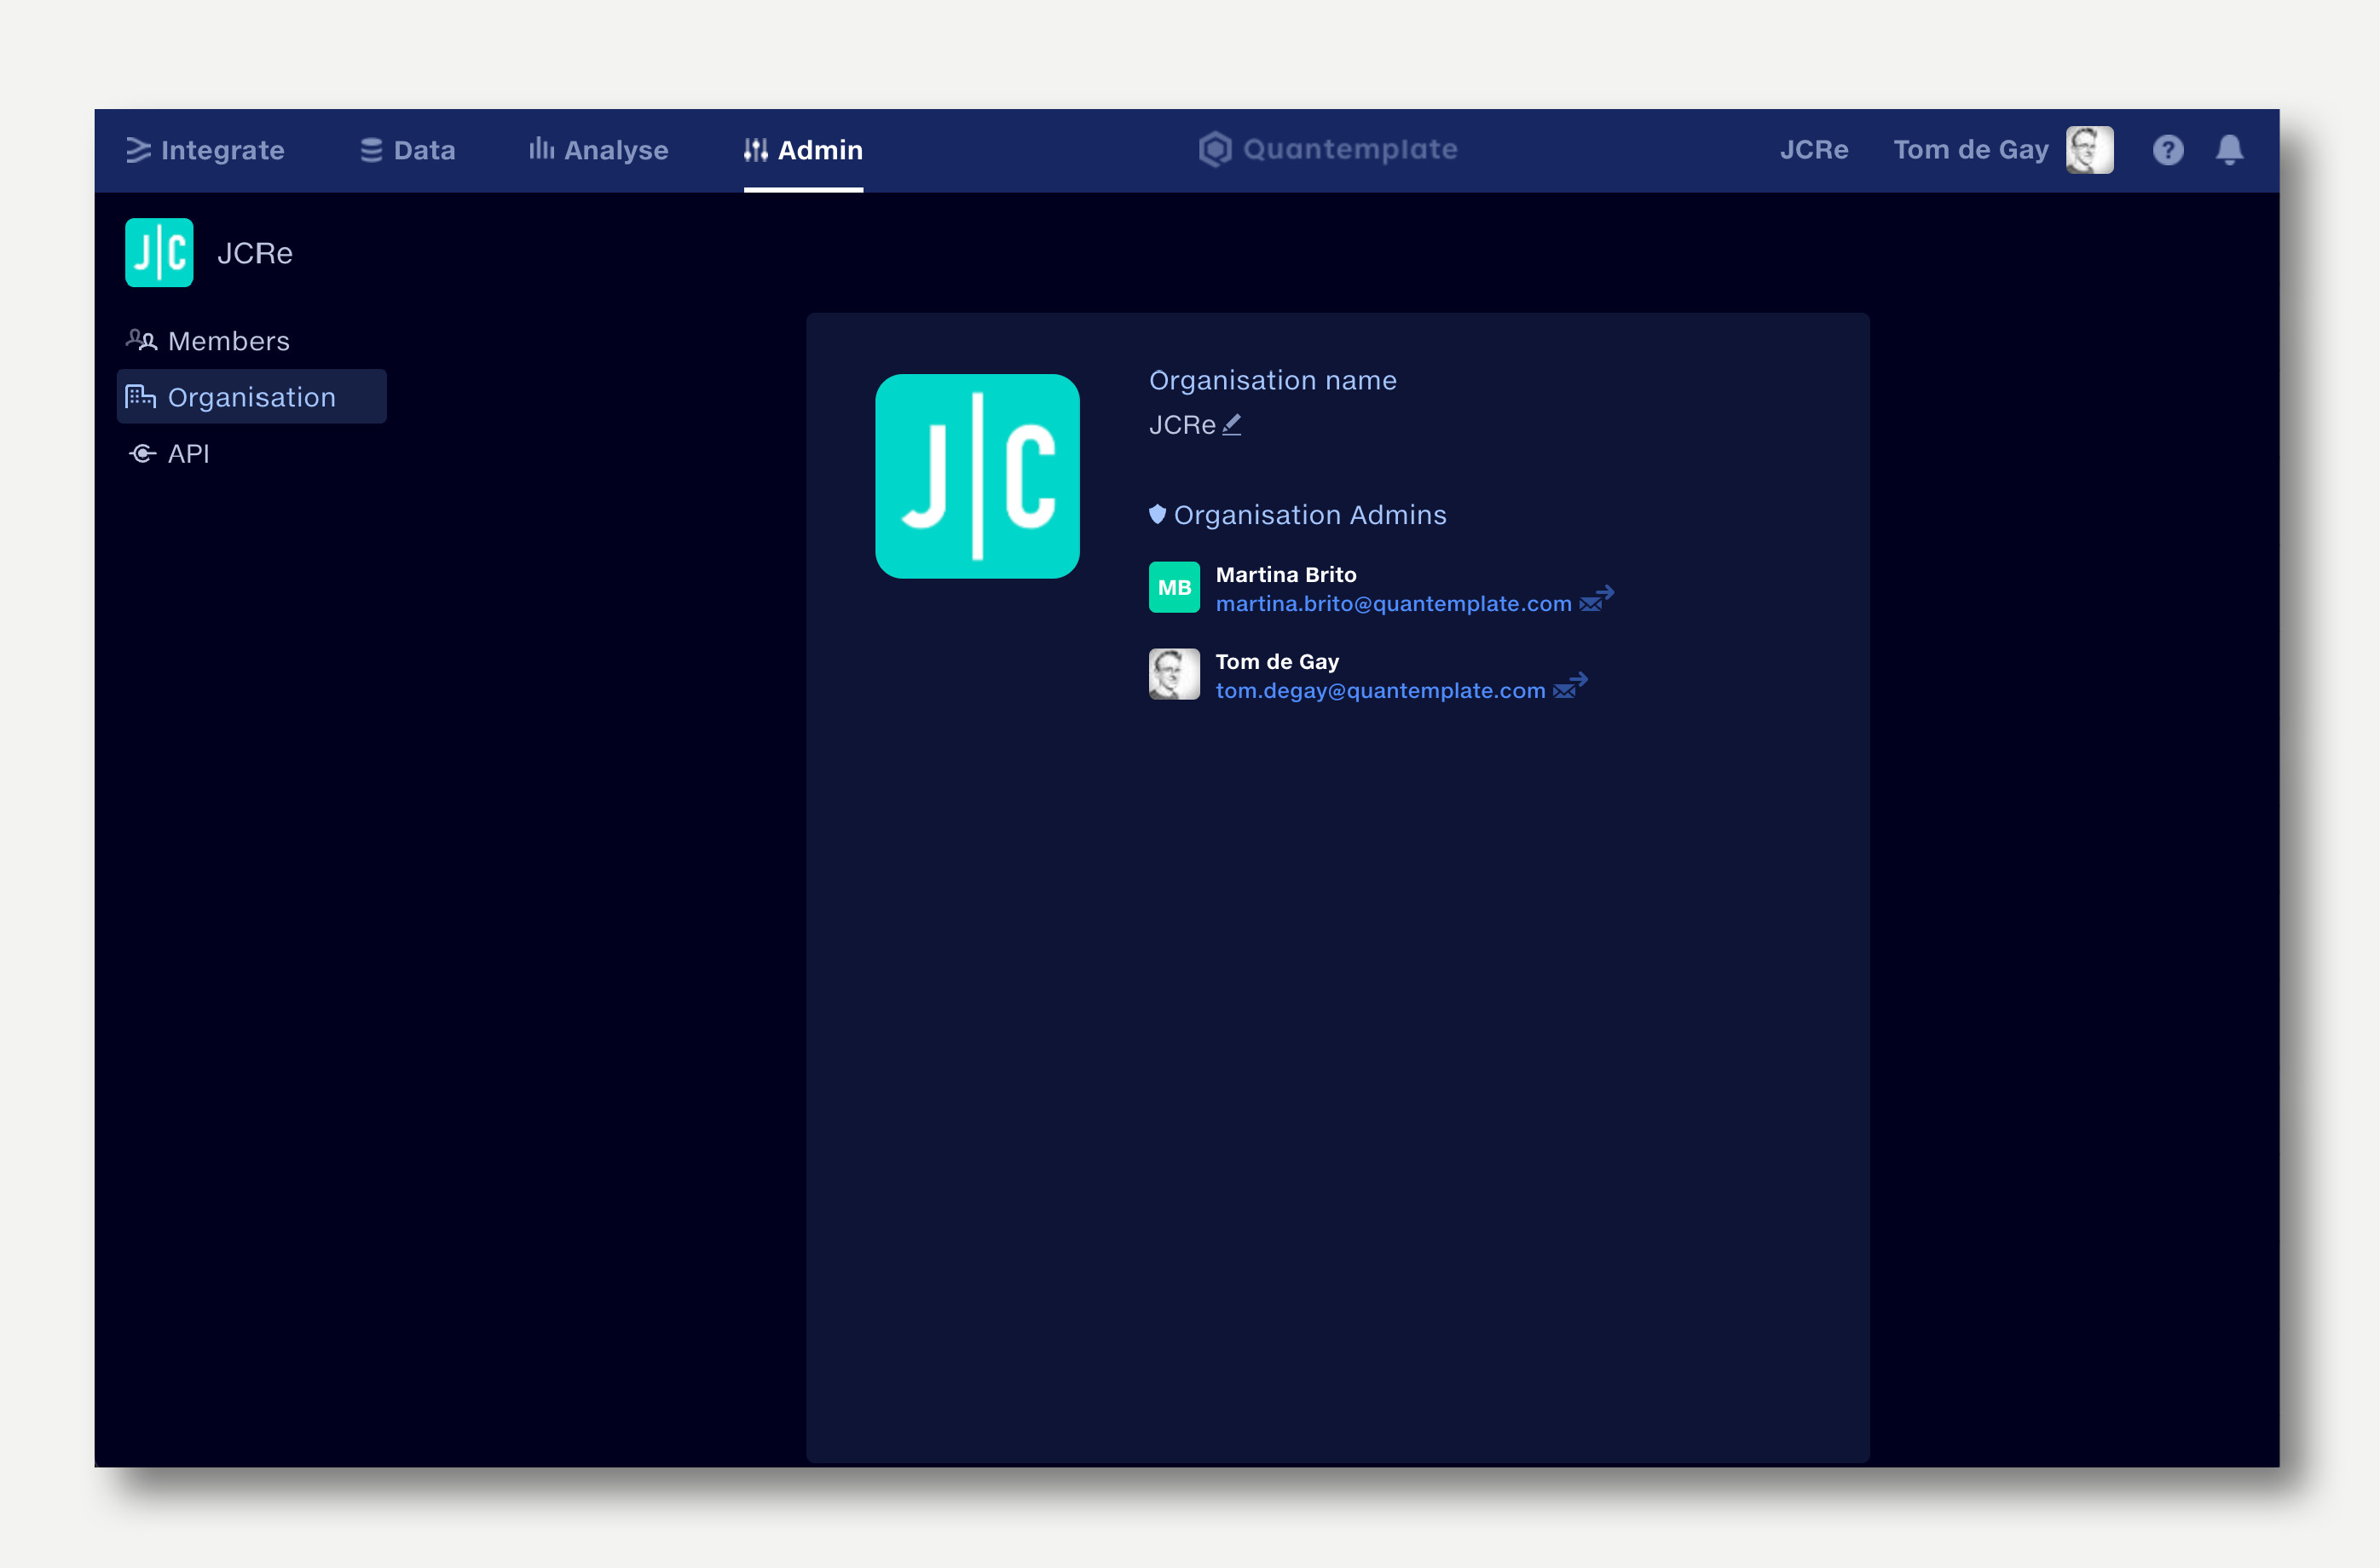
Click the organisation name to edit it. The name is displayed to all members of your organisation.
Click the organisation logo to upload a new one. The logo is displayed to all members of your organisation.
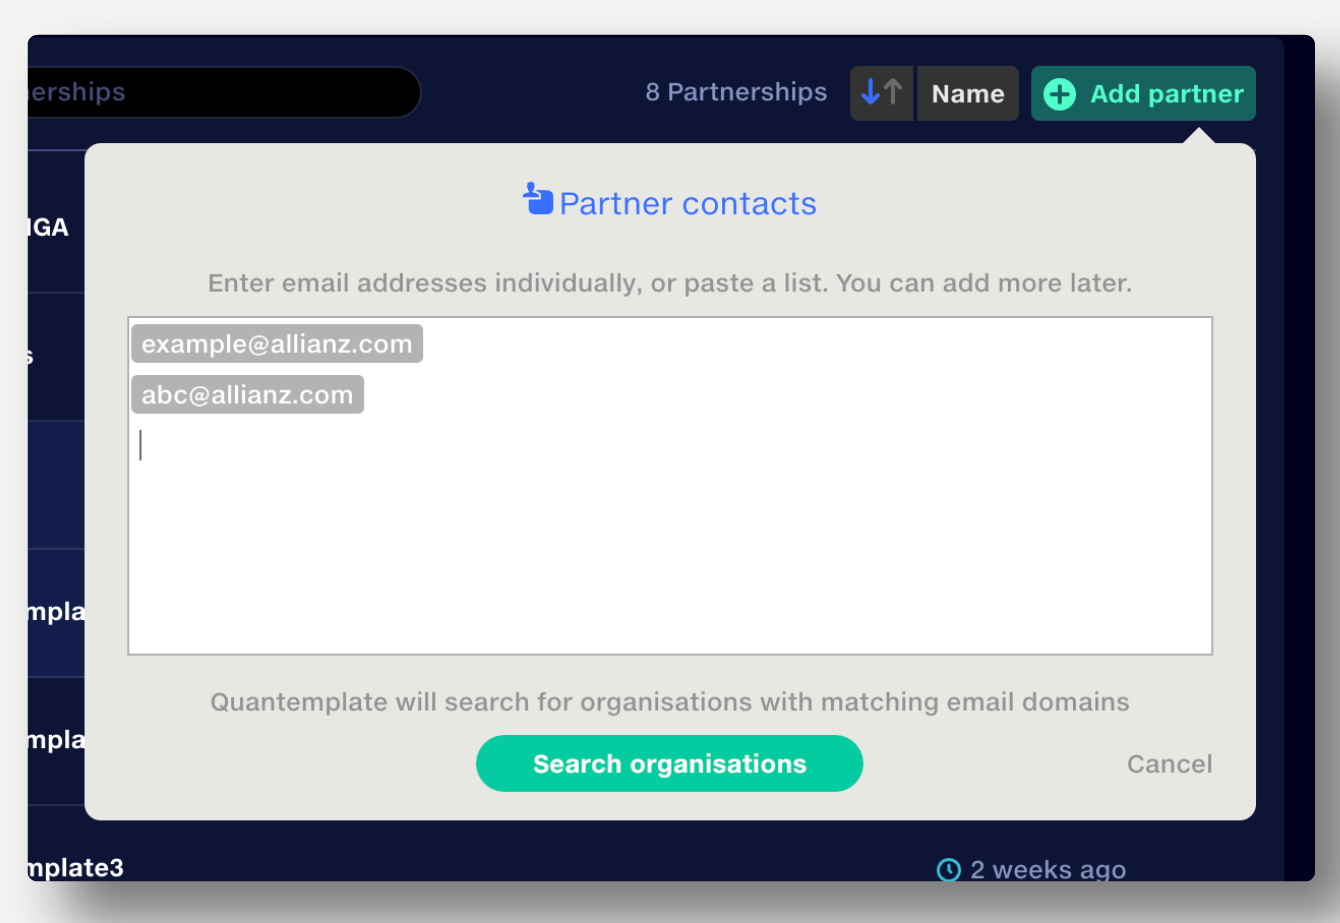
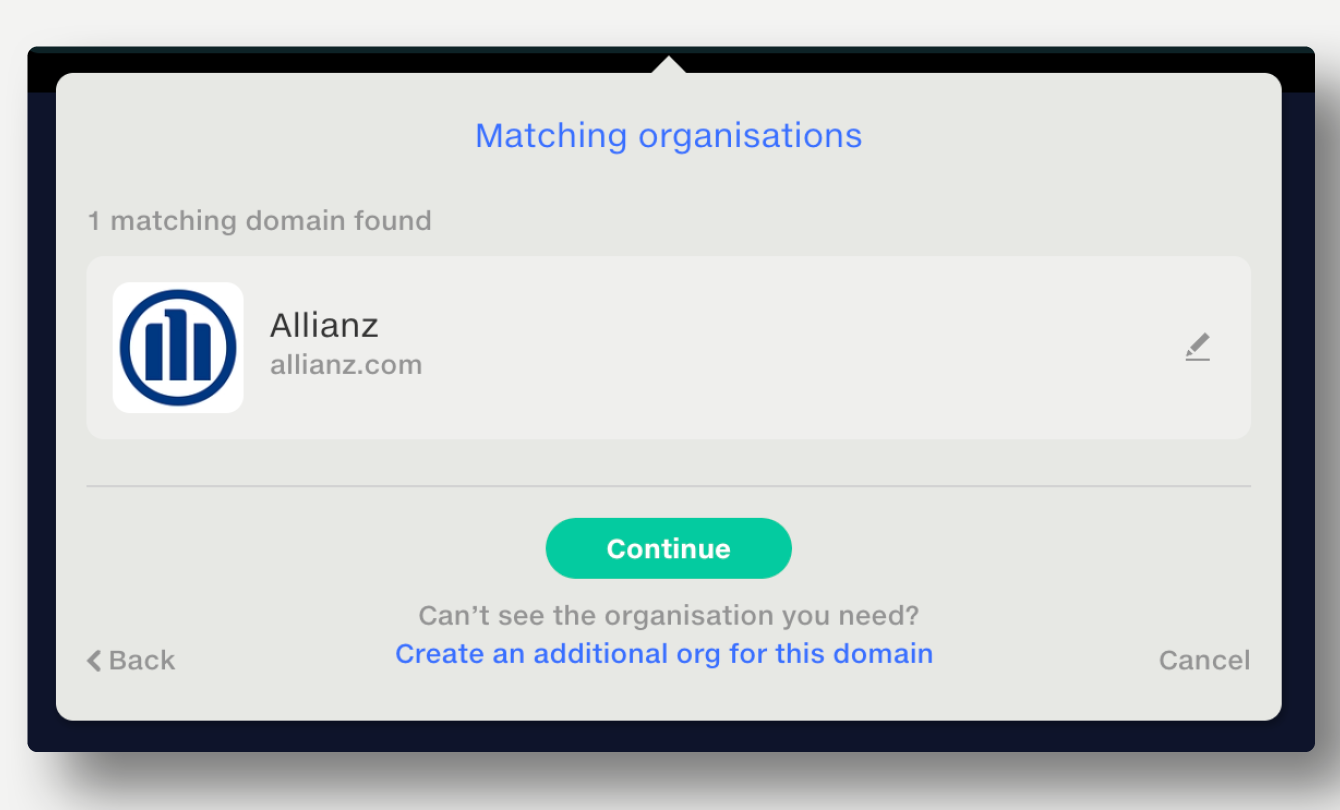
Your commercial partners can find your organisation on the Quantemplate network when they enter an email address containing your web domain in the New Partnership setup. The domains associated with your organisation are listed.
To hide your organisation from searches on the Quantemplate network, contact support@quantemplate.com.
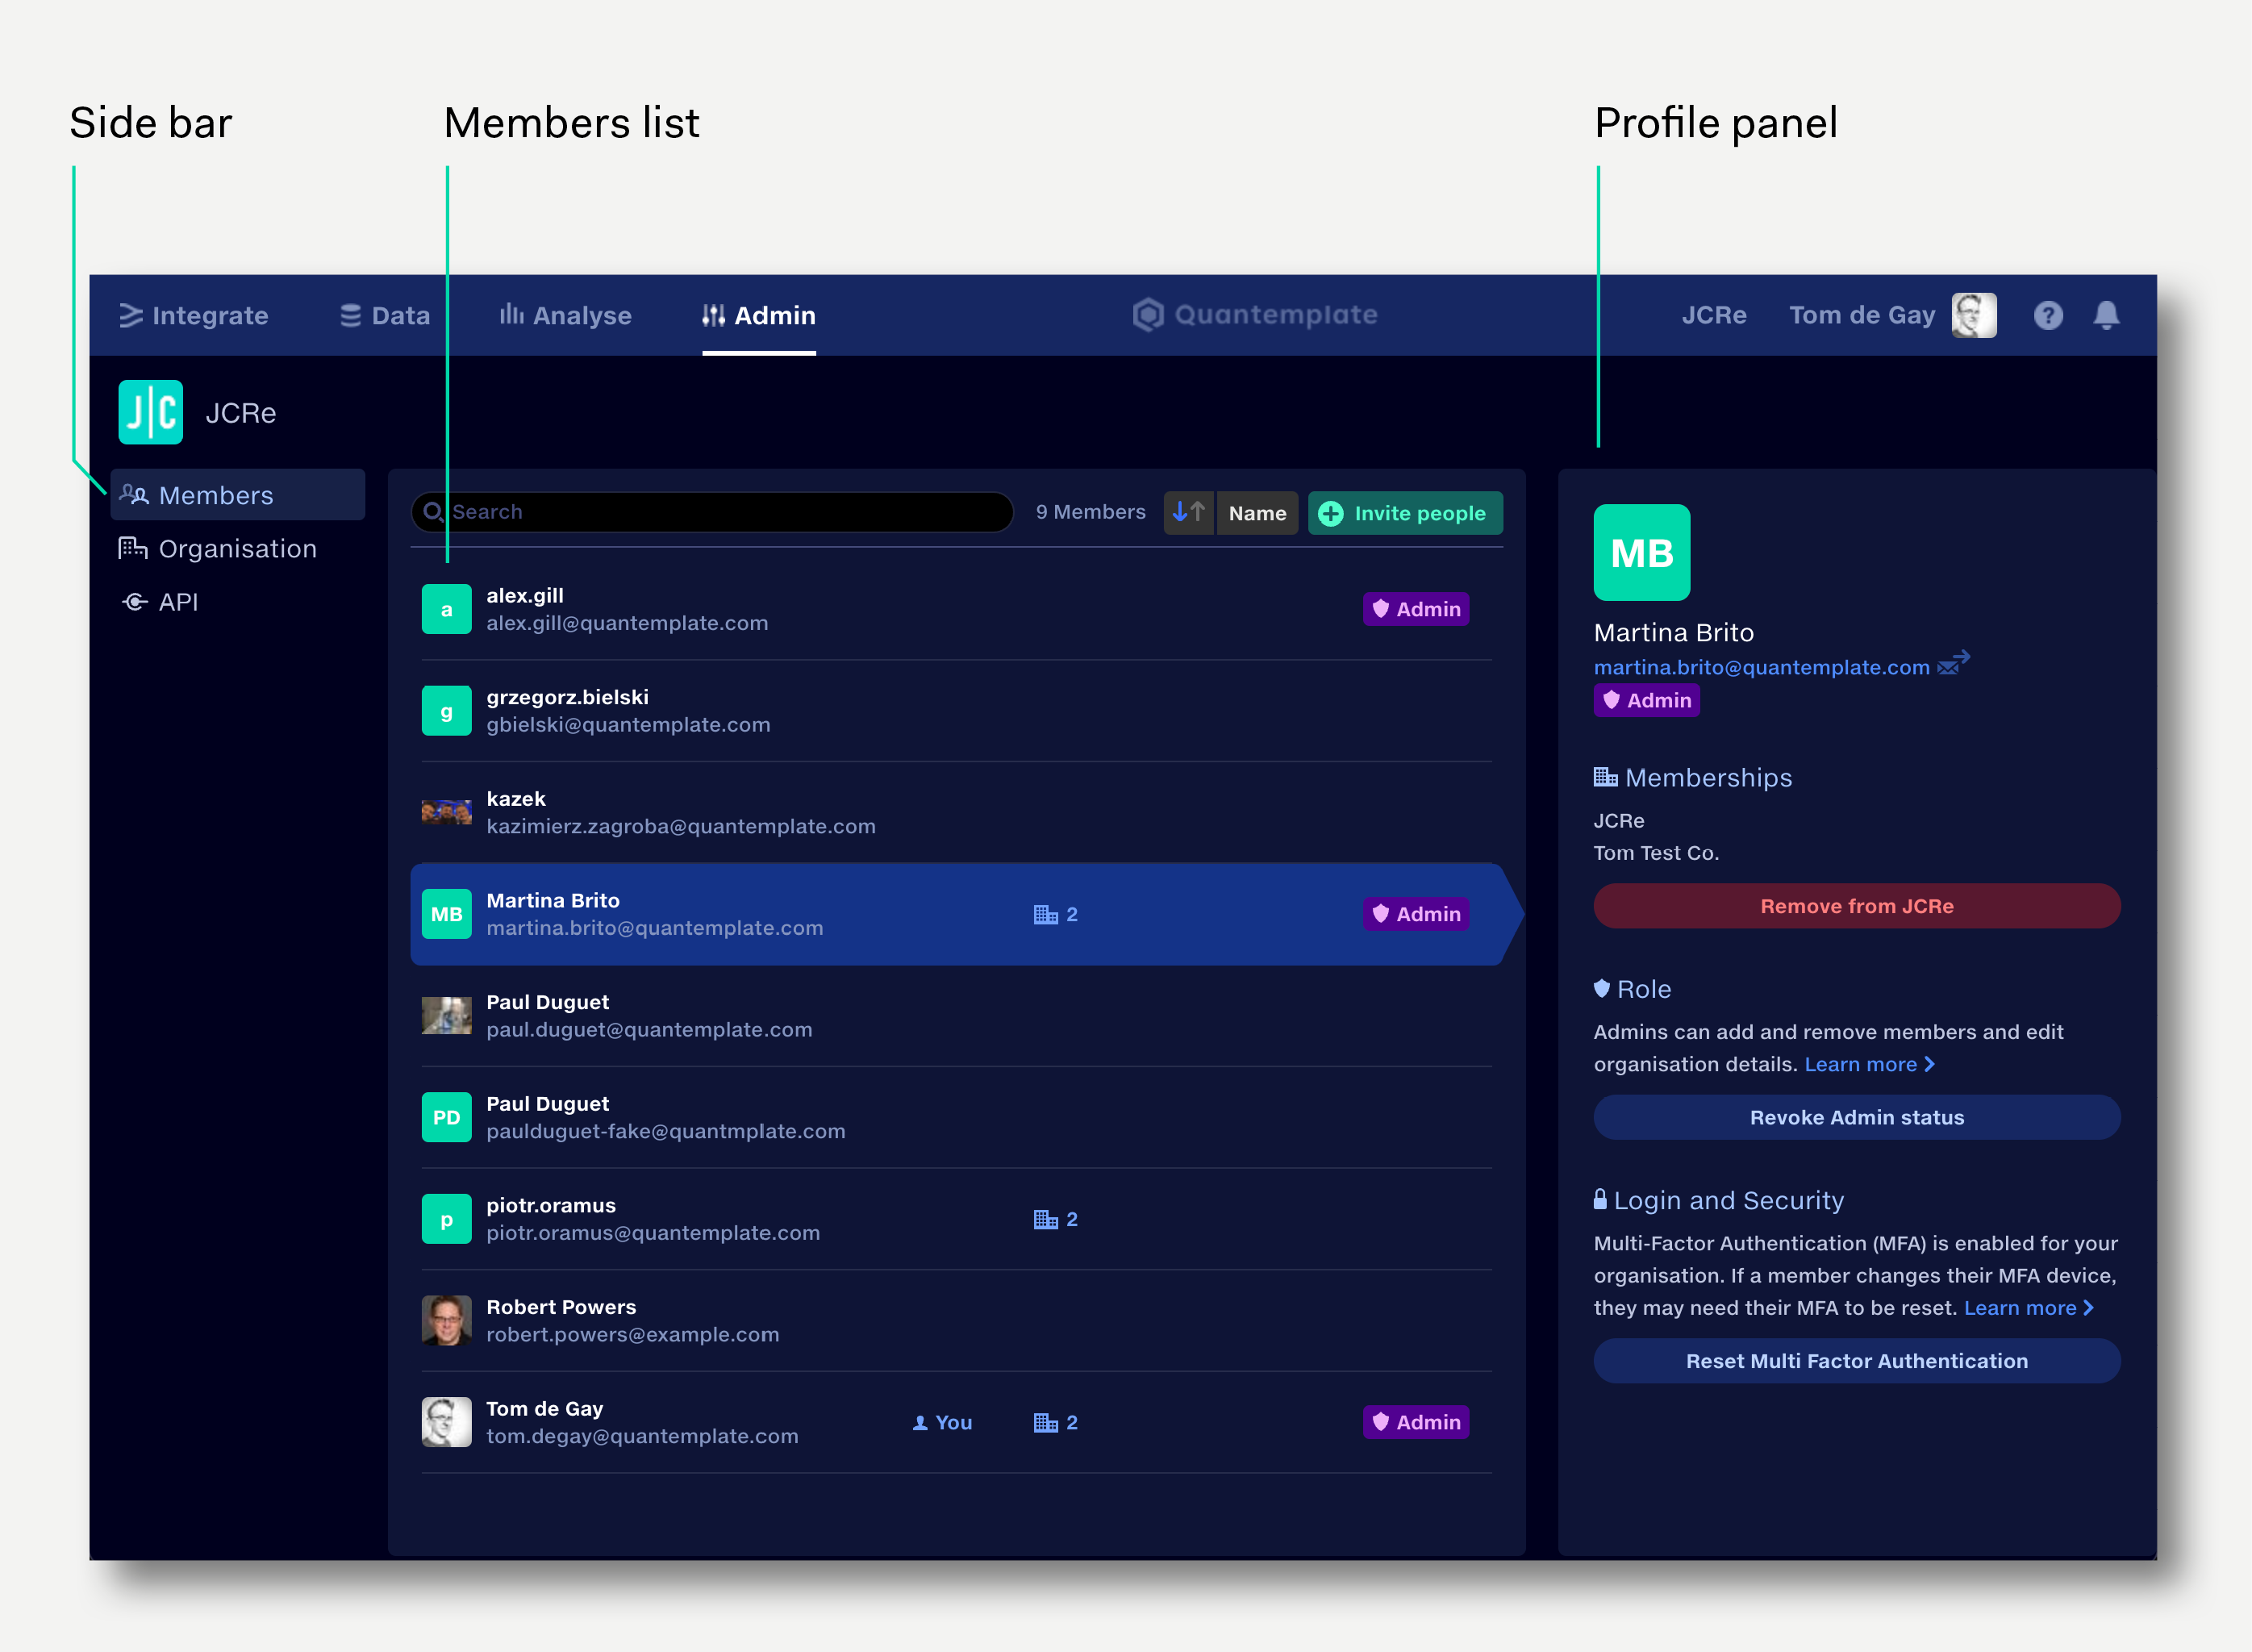
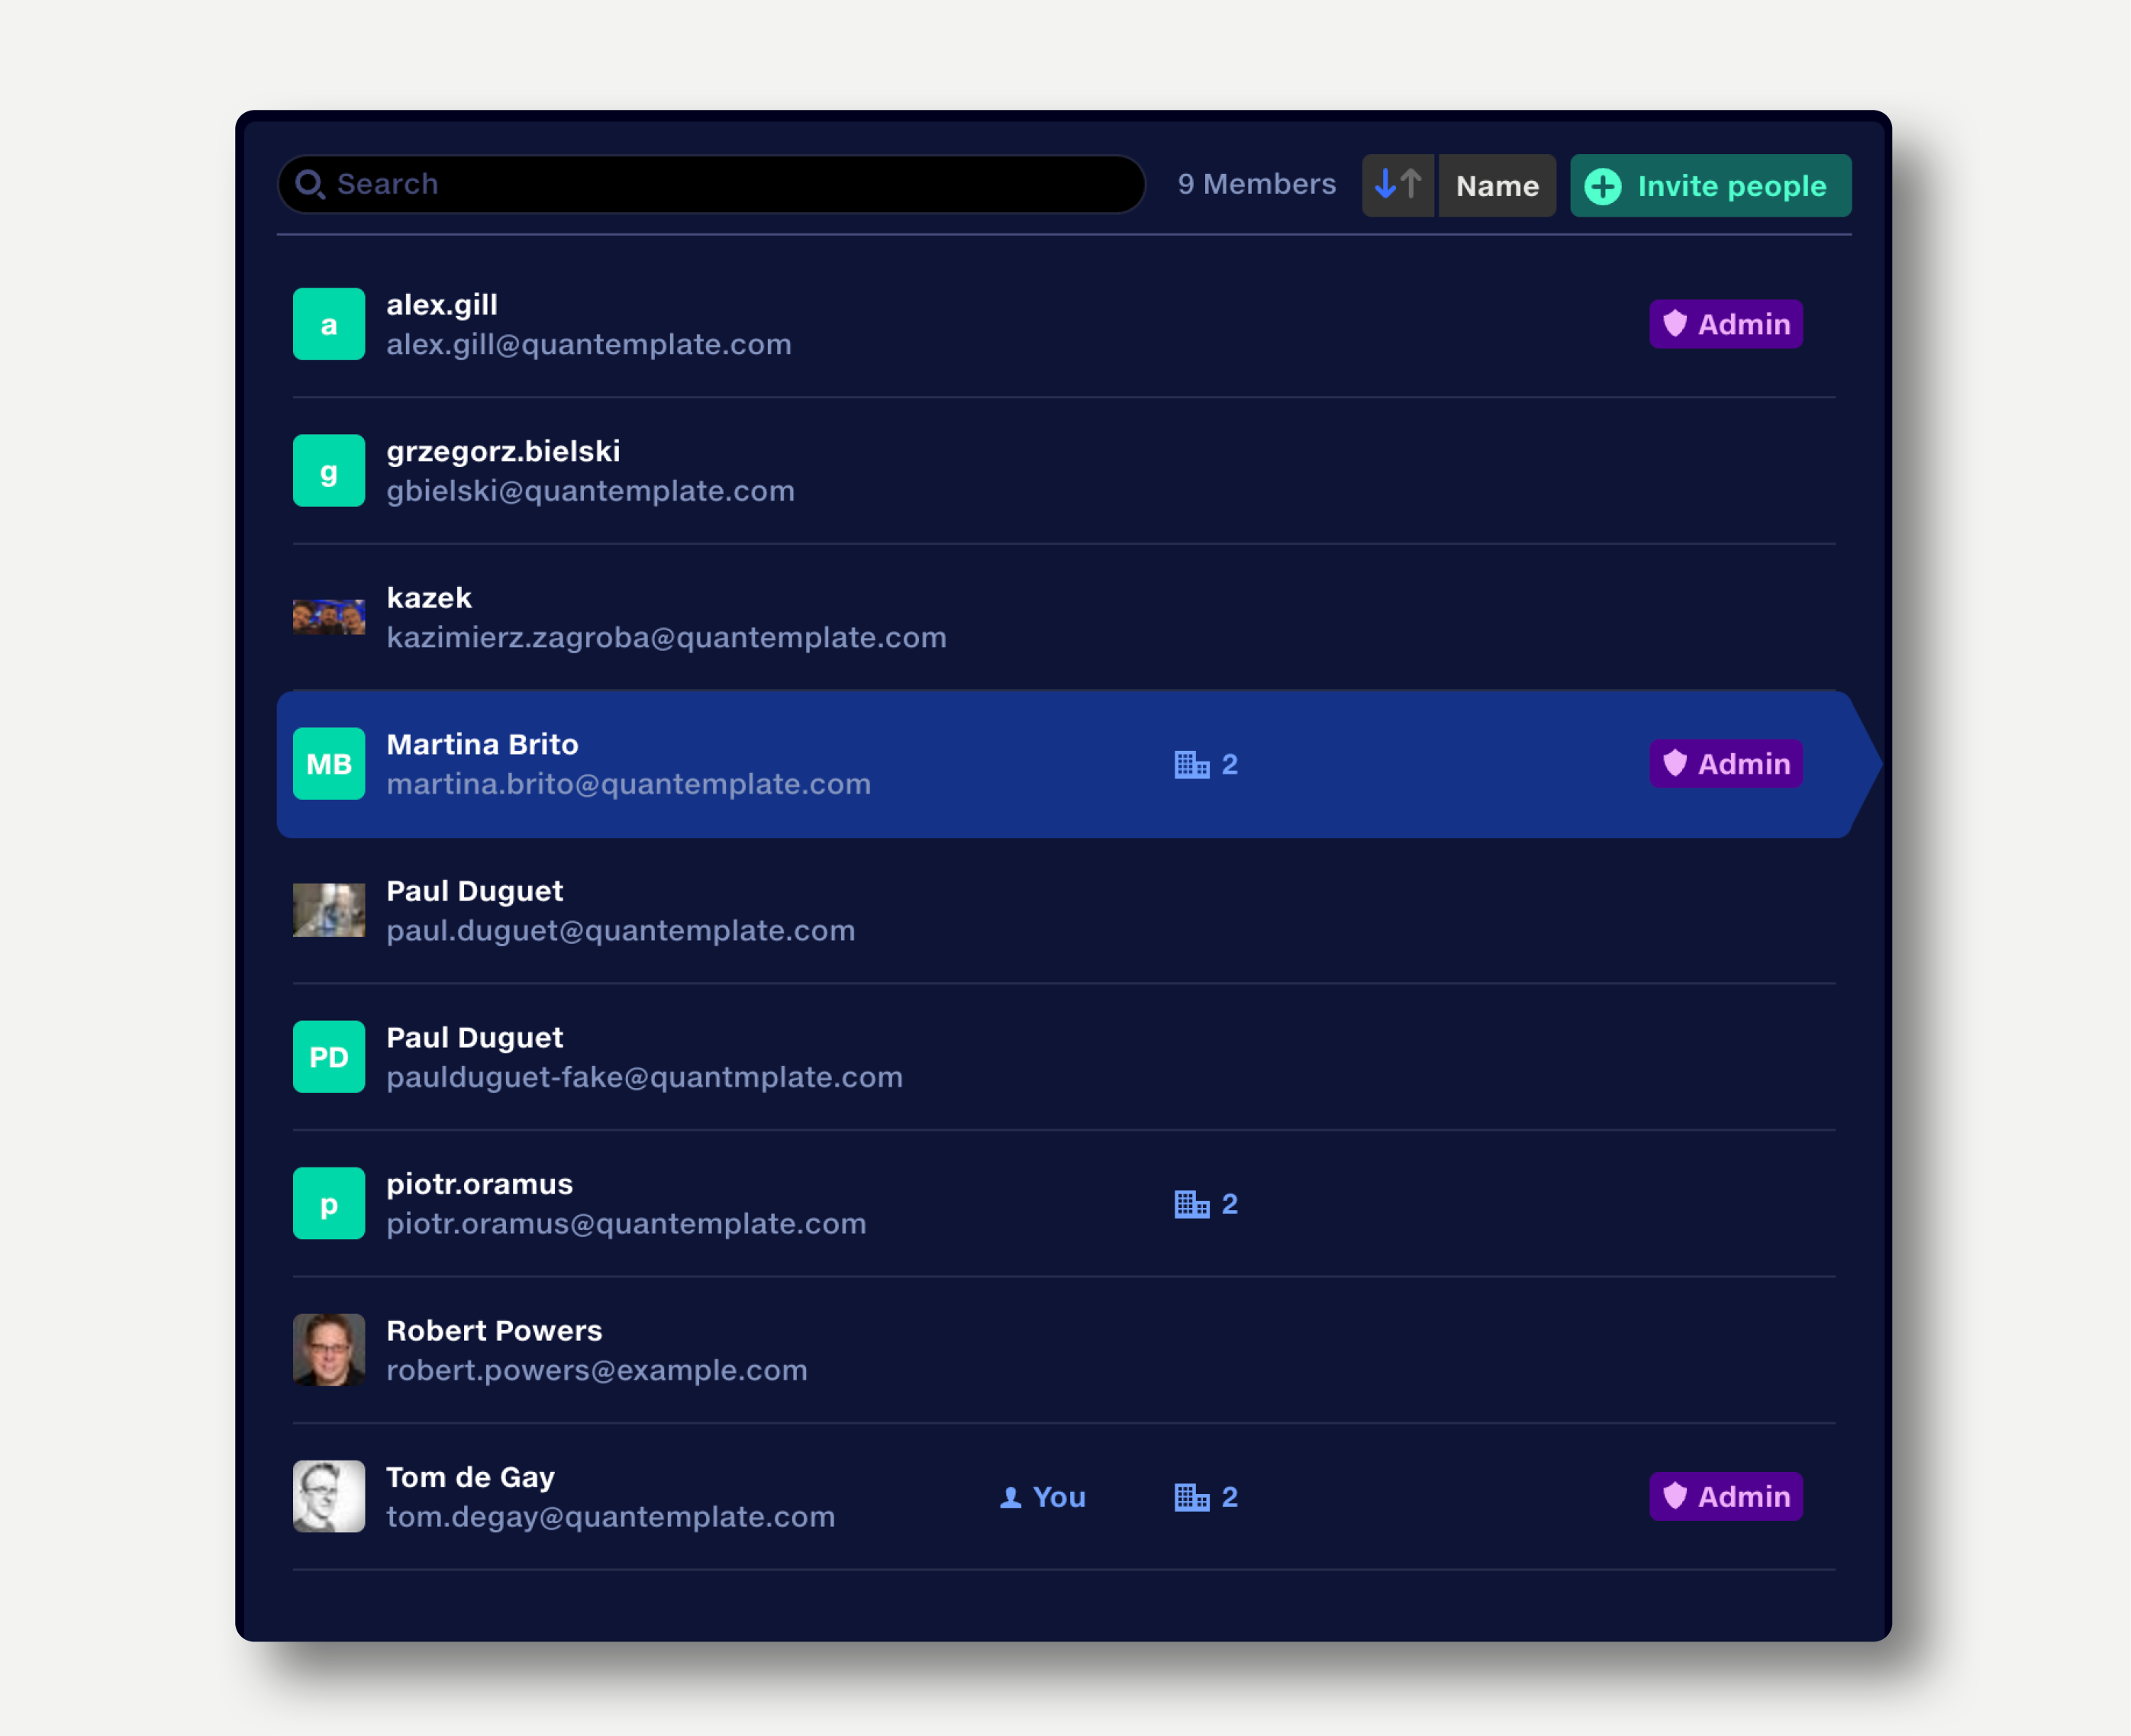
Click the Members item in the sidebar to view a list of members of your organisation, the date they joined and the date of their most recent activity.
To invite new members, click ‘Invite new’ and enter their email addresses. For multiple members, a list of emails can be pasted in.
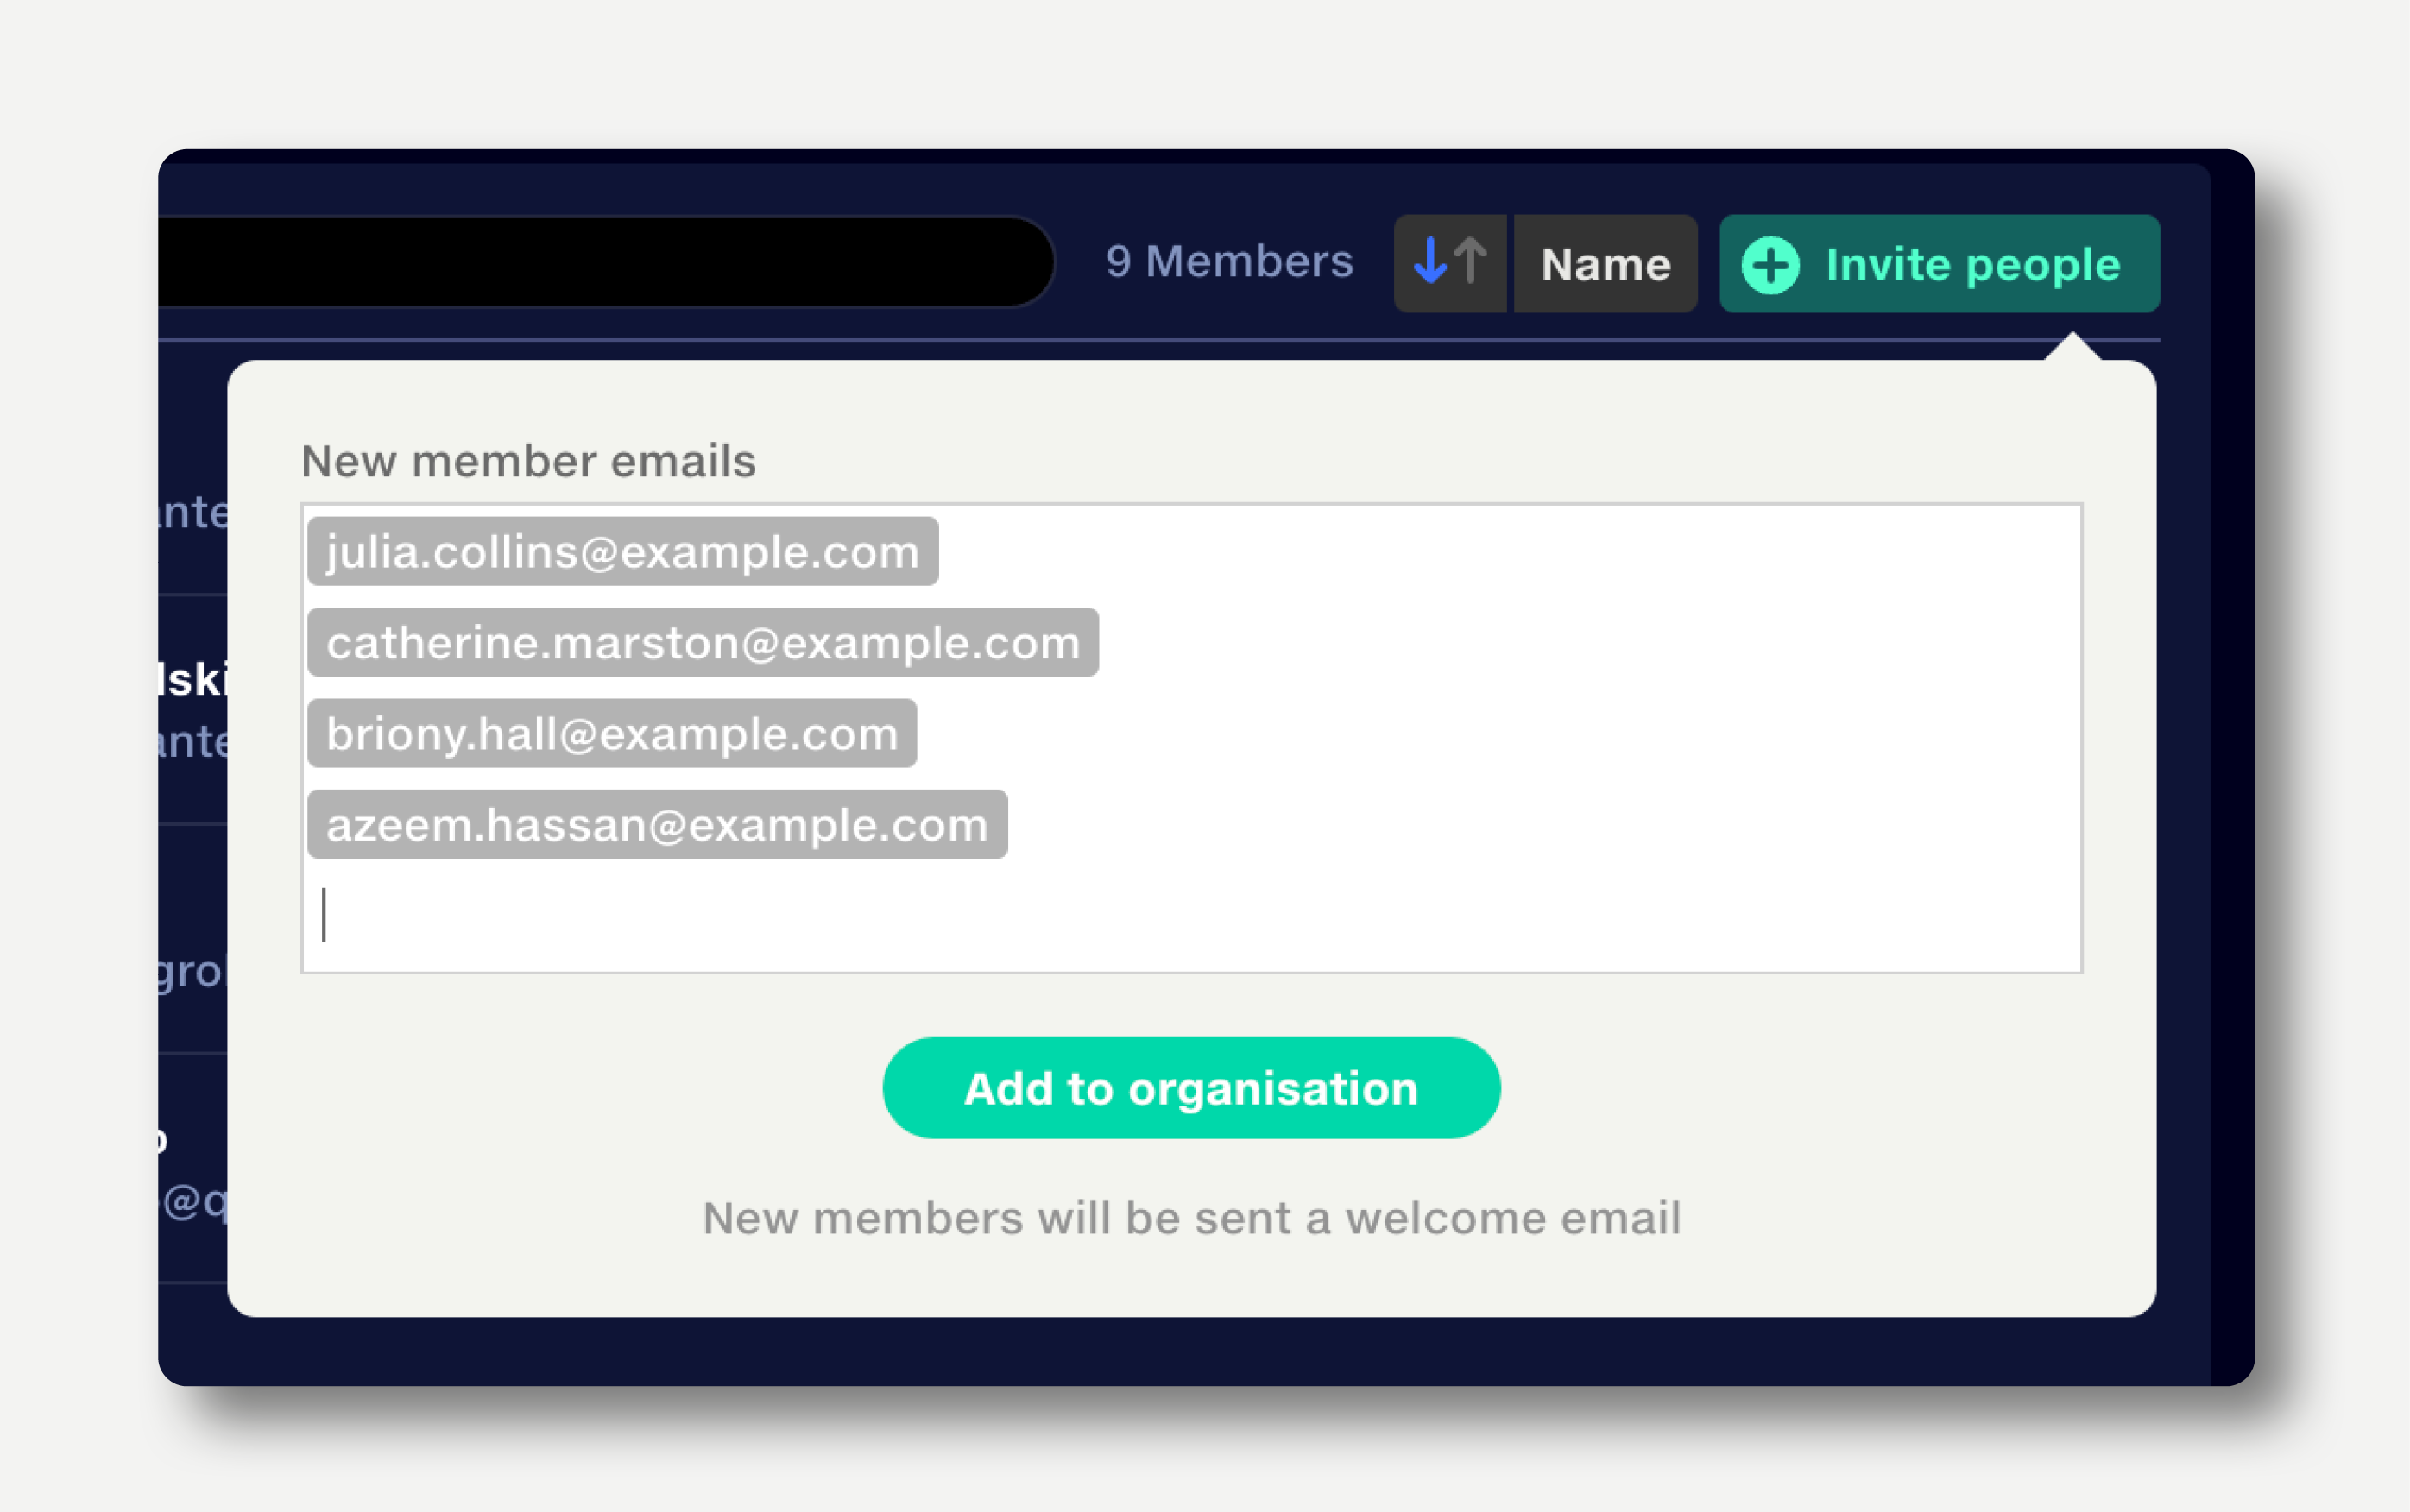
The new members will be added to the organisation immediately. Their user name will initially be their email address.
New members will be sent a link to set up their password and Multi-Factor Authentication. When they log in for the first time, they will be shown a welcome page where they can set their name and profile photo.
If an invitee already belongs to an organisation on Quantemplate, when they are added to a new organisation they will be sent a notification email.
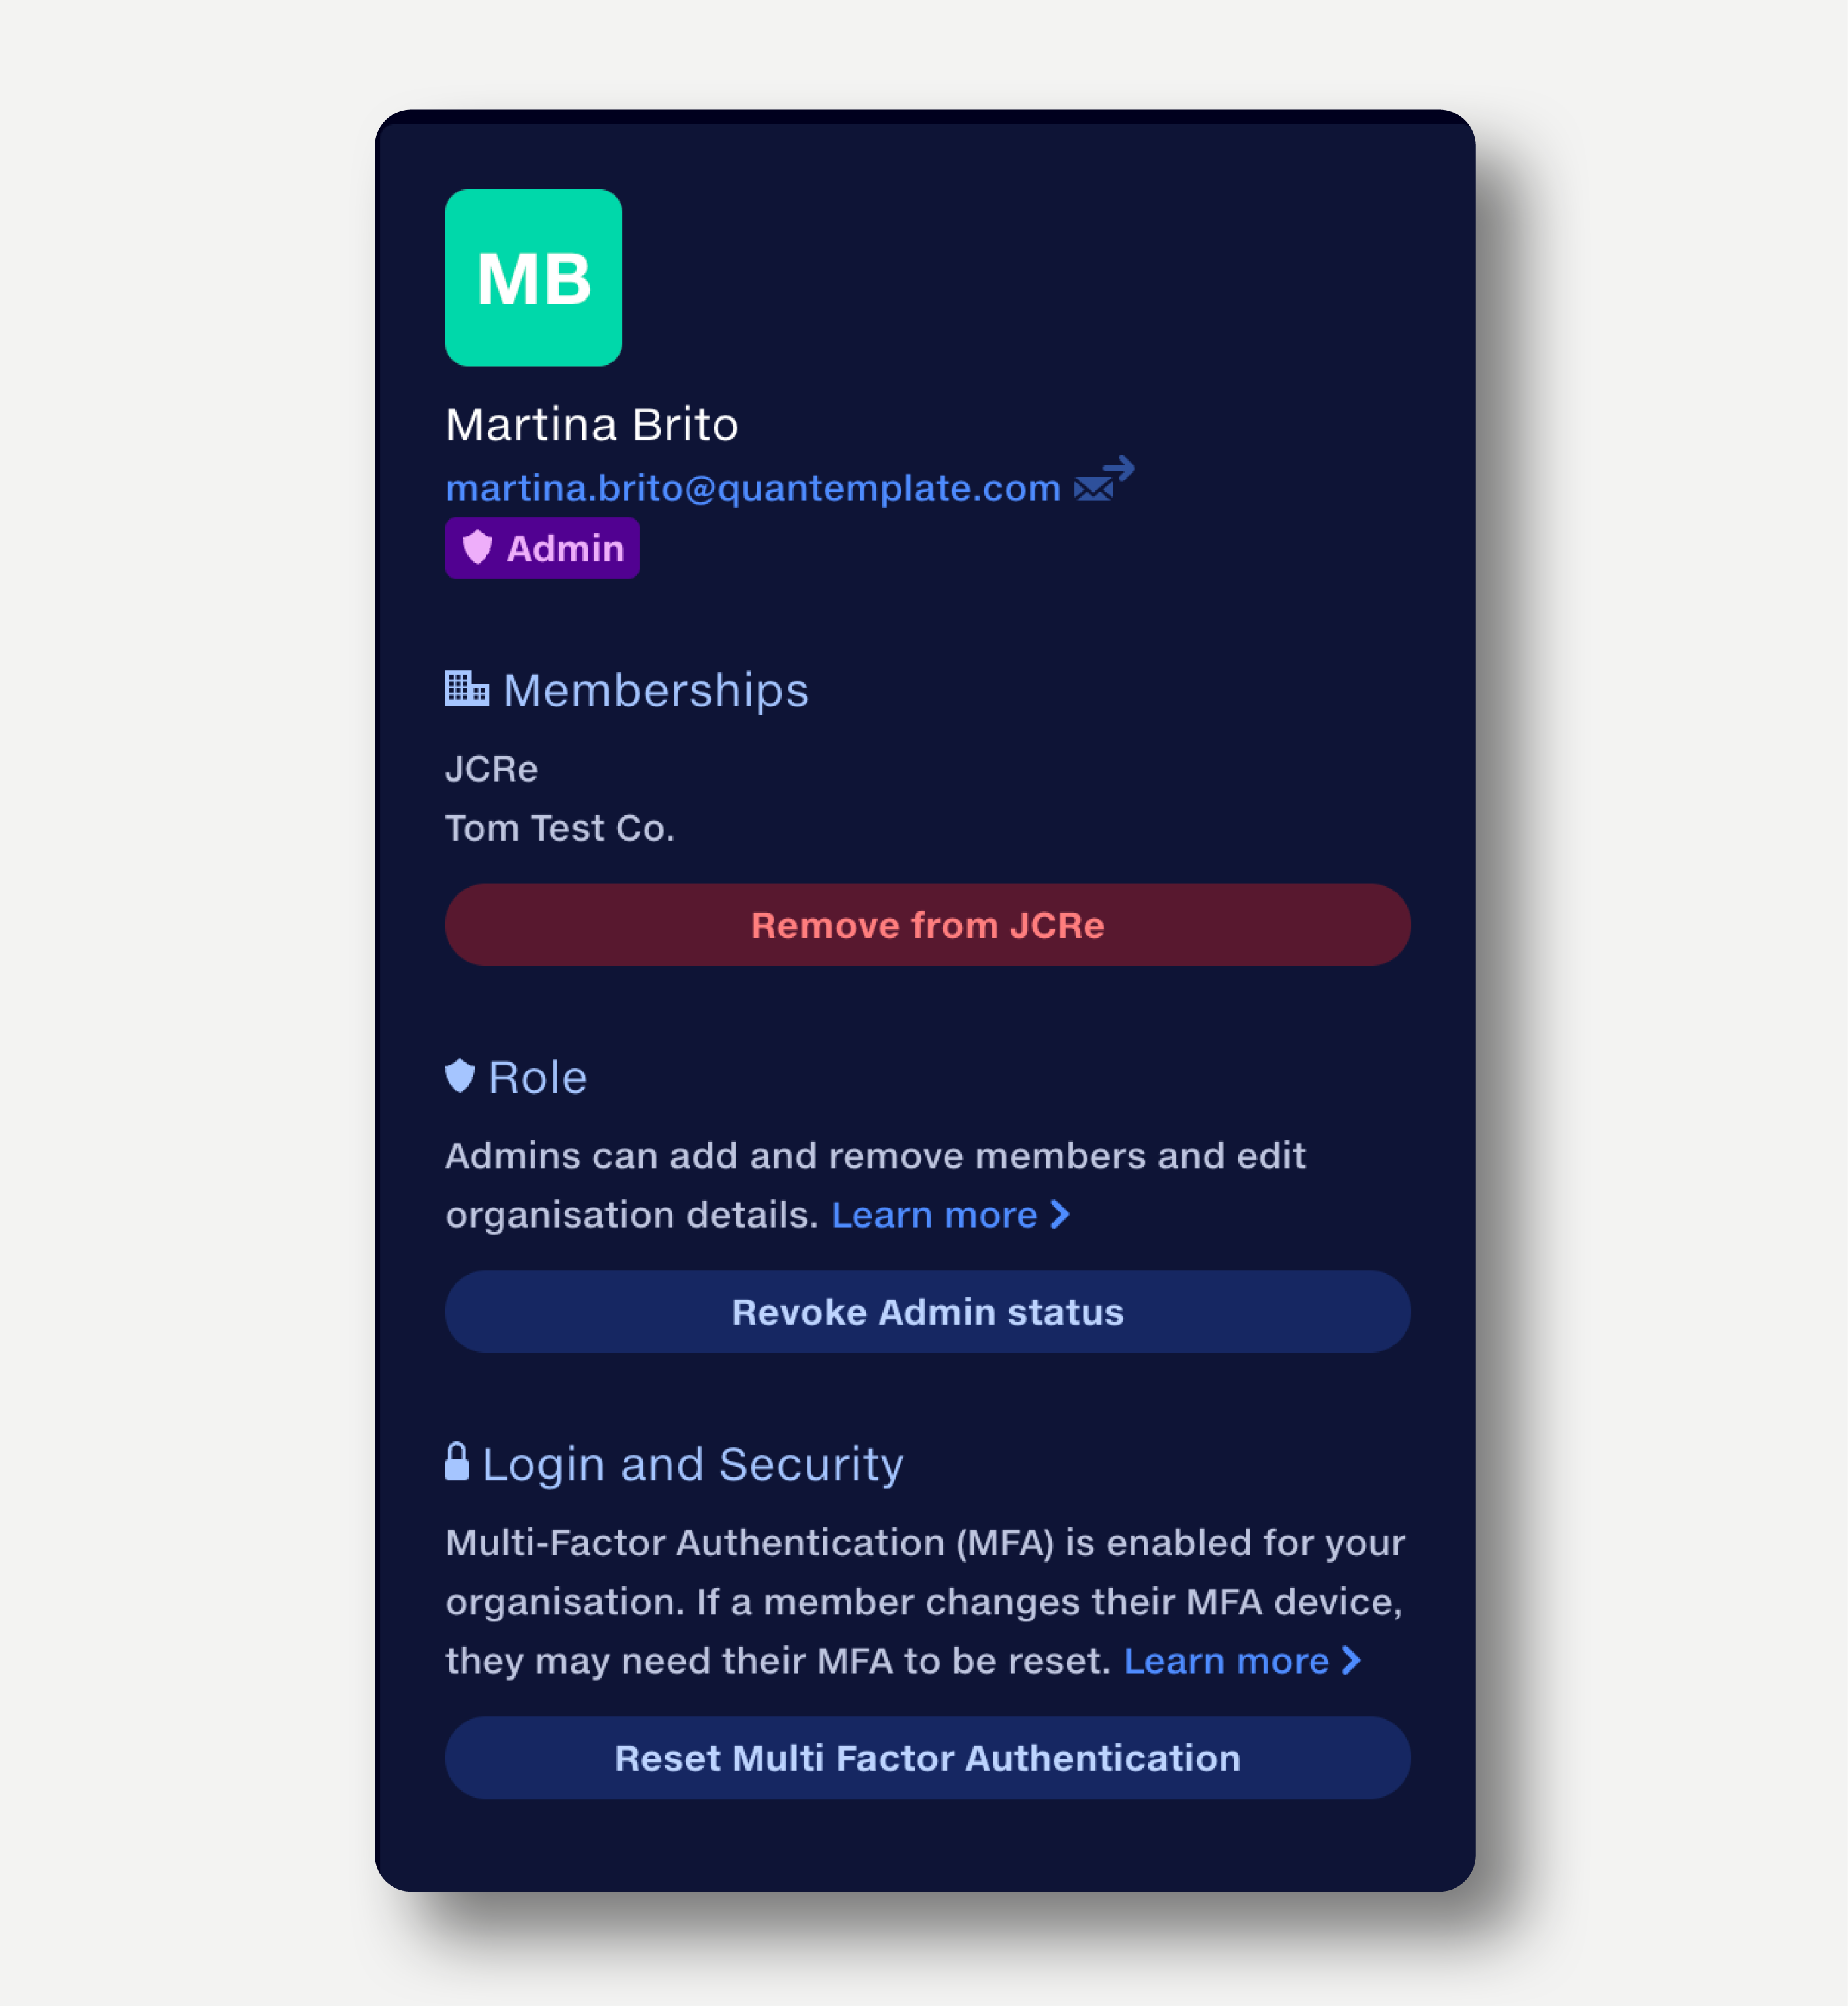
To view a member profile, click on their entry in the members list. The profile panel on the right displays their name, profile photo and any organisations you both are members of.
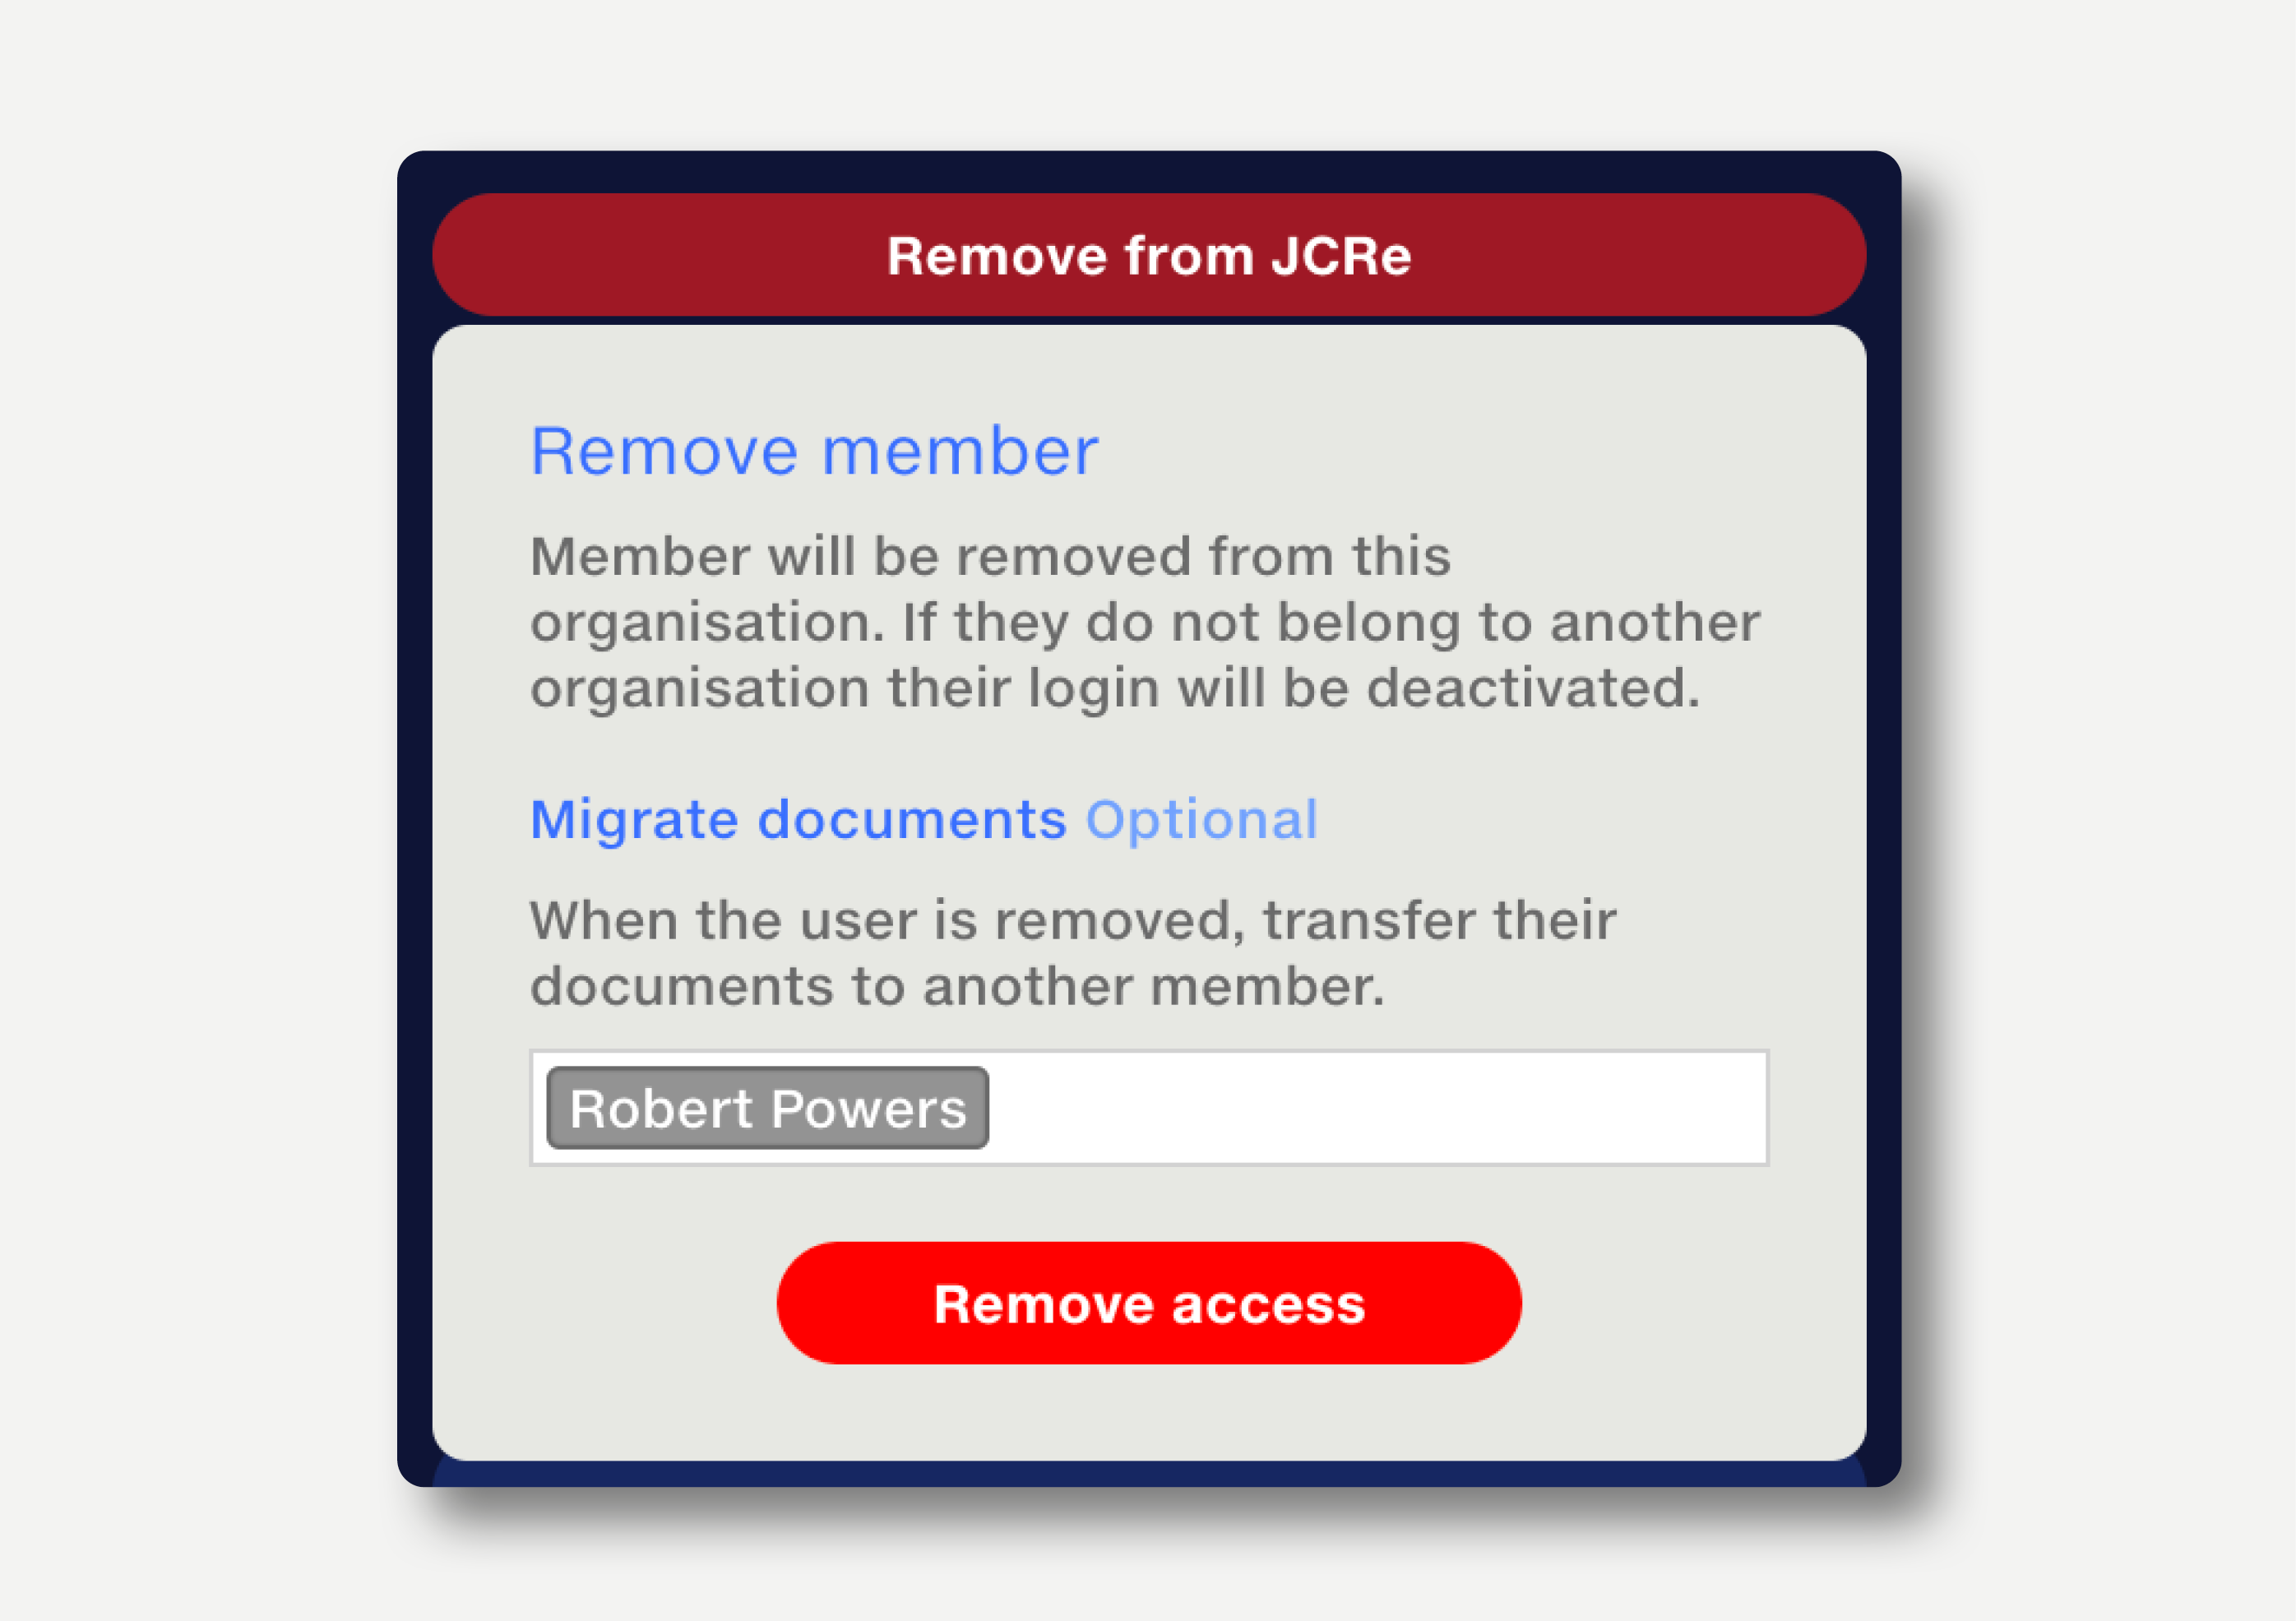
To remove a member:
When a member is removed from an organisation, they will be sent a notification email.
To leave an organisation, you will need to ask another Admin within the organisation to remove you.
Organisation Admins have access to all the functions in the Admin panel.
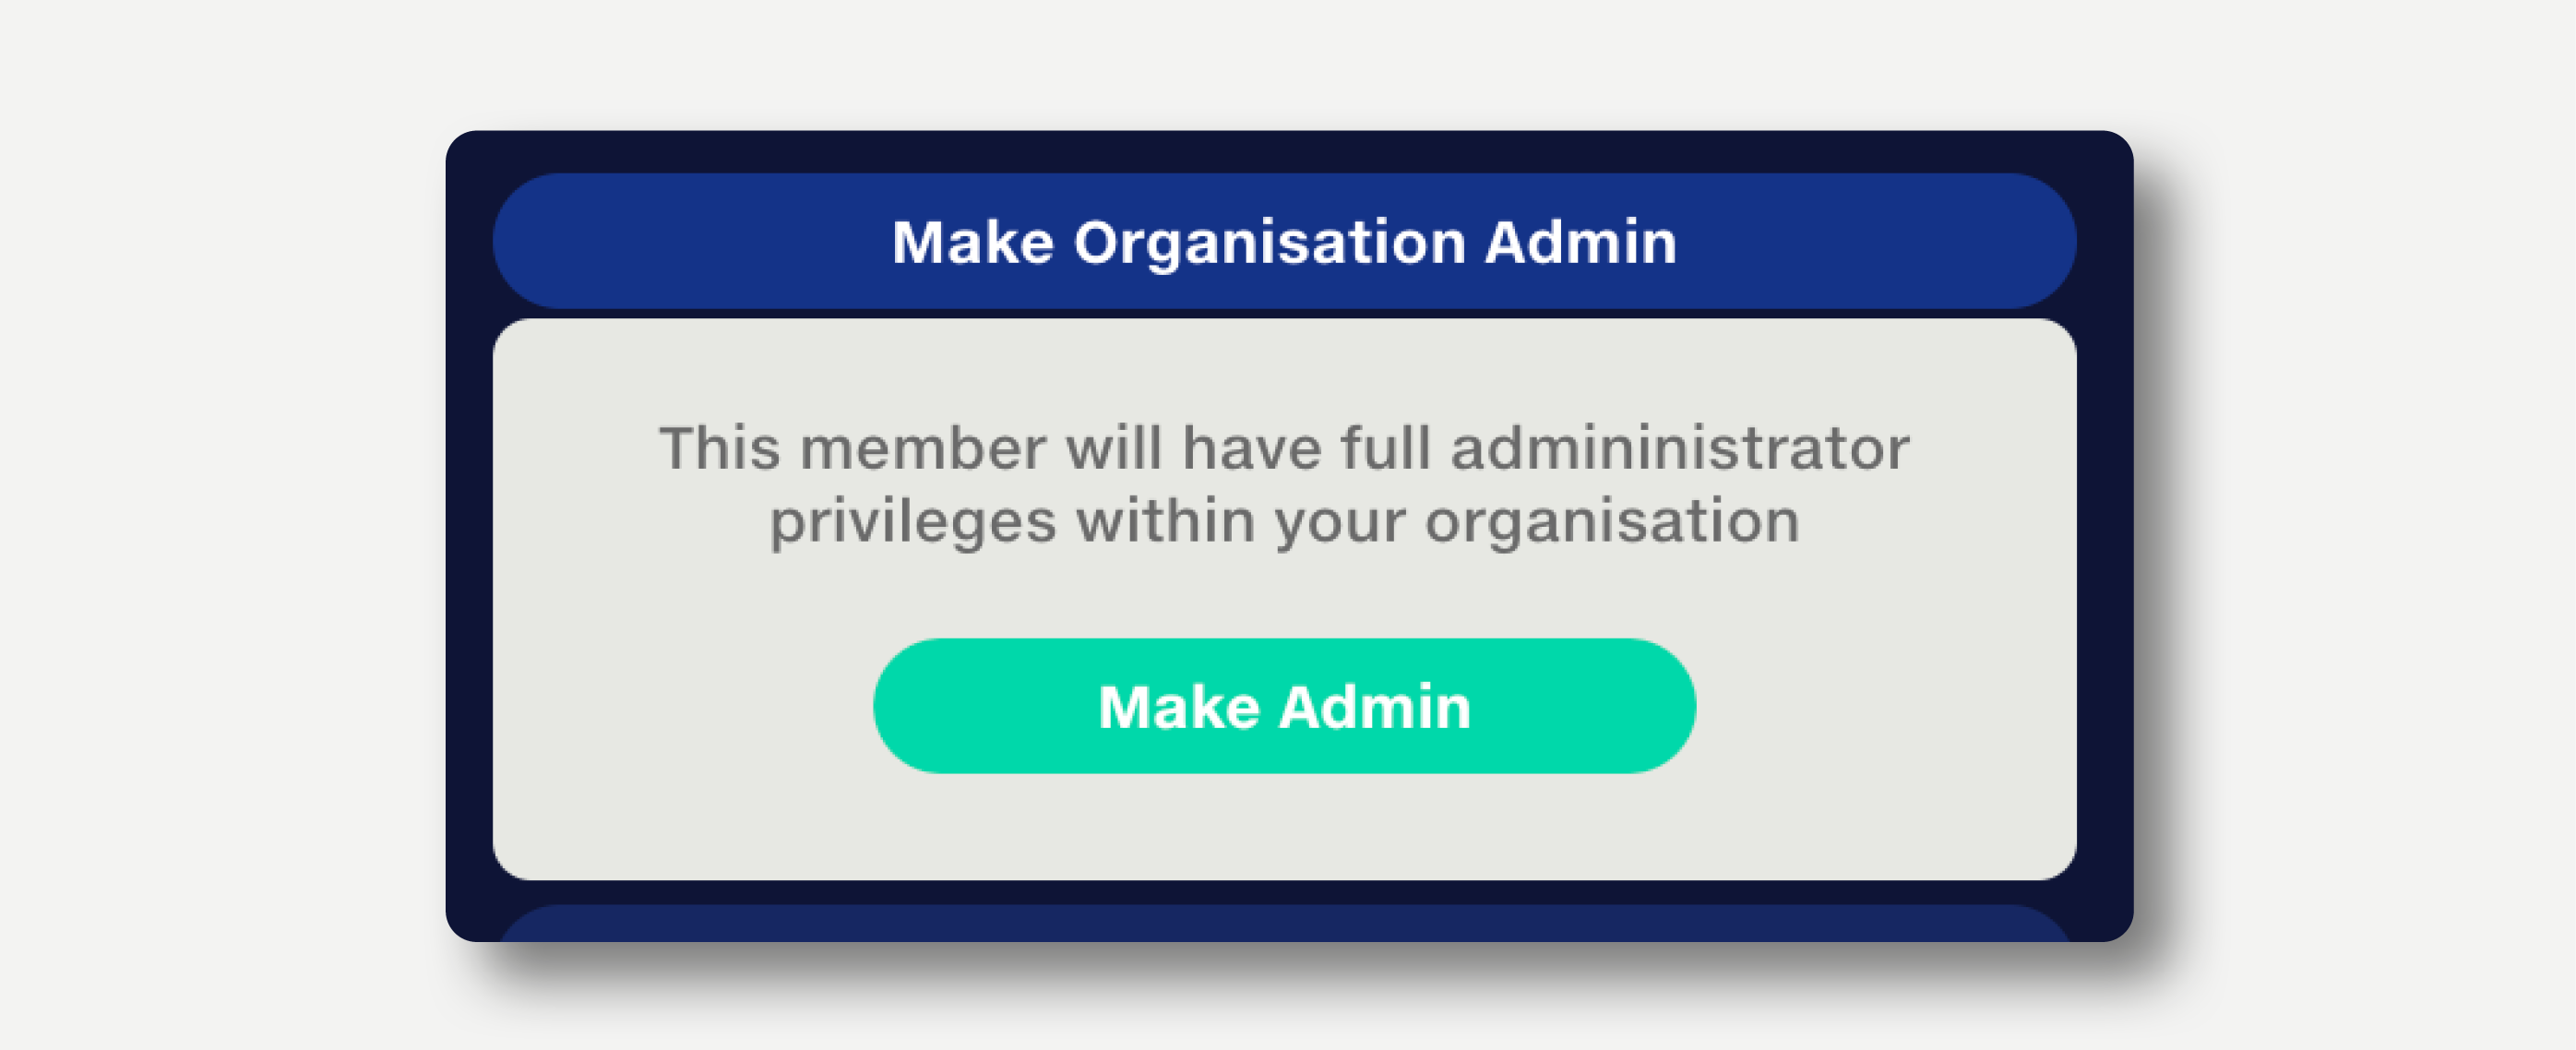
To make a member an Admin, click the ‘Make Admin’ button on their profile panel.
To revoke their Admin status, click the ‘Revoke Admin’ button.
When a member’s Admin status changes, they will be sent a notification email.
To remove your own Admin role, you will need to ask another Admin within the organisation. Once your role has been removed, you will no longer have access to the Admin tools.
If a user no longer has access to their MFA device, or their device has been reset, they may need their MFA to be reset in order to access Quantemplate. To do this, click the ‘Reset Multi-Factor Authentication’ button on their profile panel.
When a user’s MFA is reset, they will be sent a notification email.

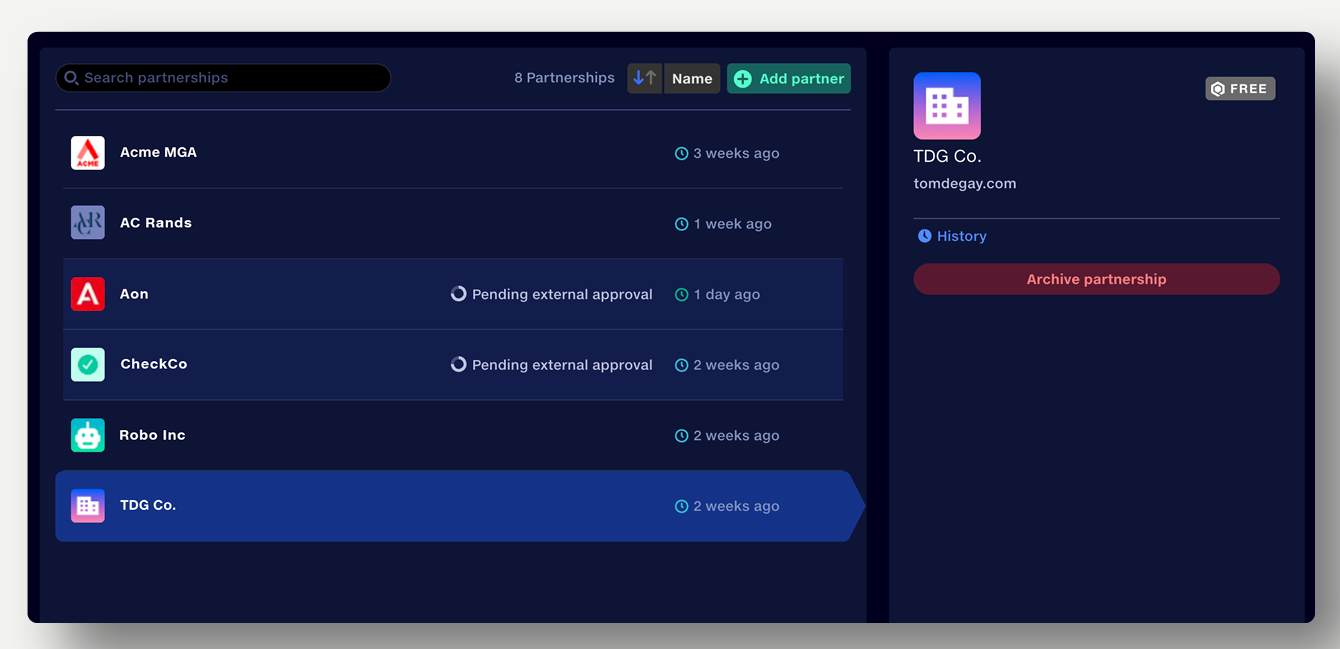
Partnerships allow organisations to exchange data with another organisation via a Feed. A new partnership can be created via the Admin tab, or directly in a Feed. Non-admin users of your organisation can request a new partnership via a Feed. These requests must be approved by an Admin in your organisation before the partnership is created.
The partnerships tab allows Admins to:
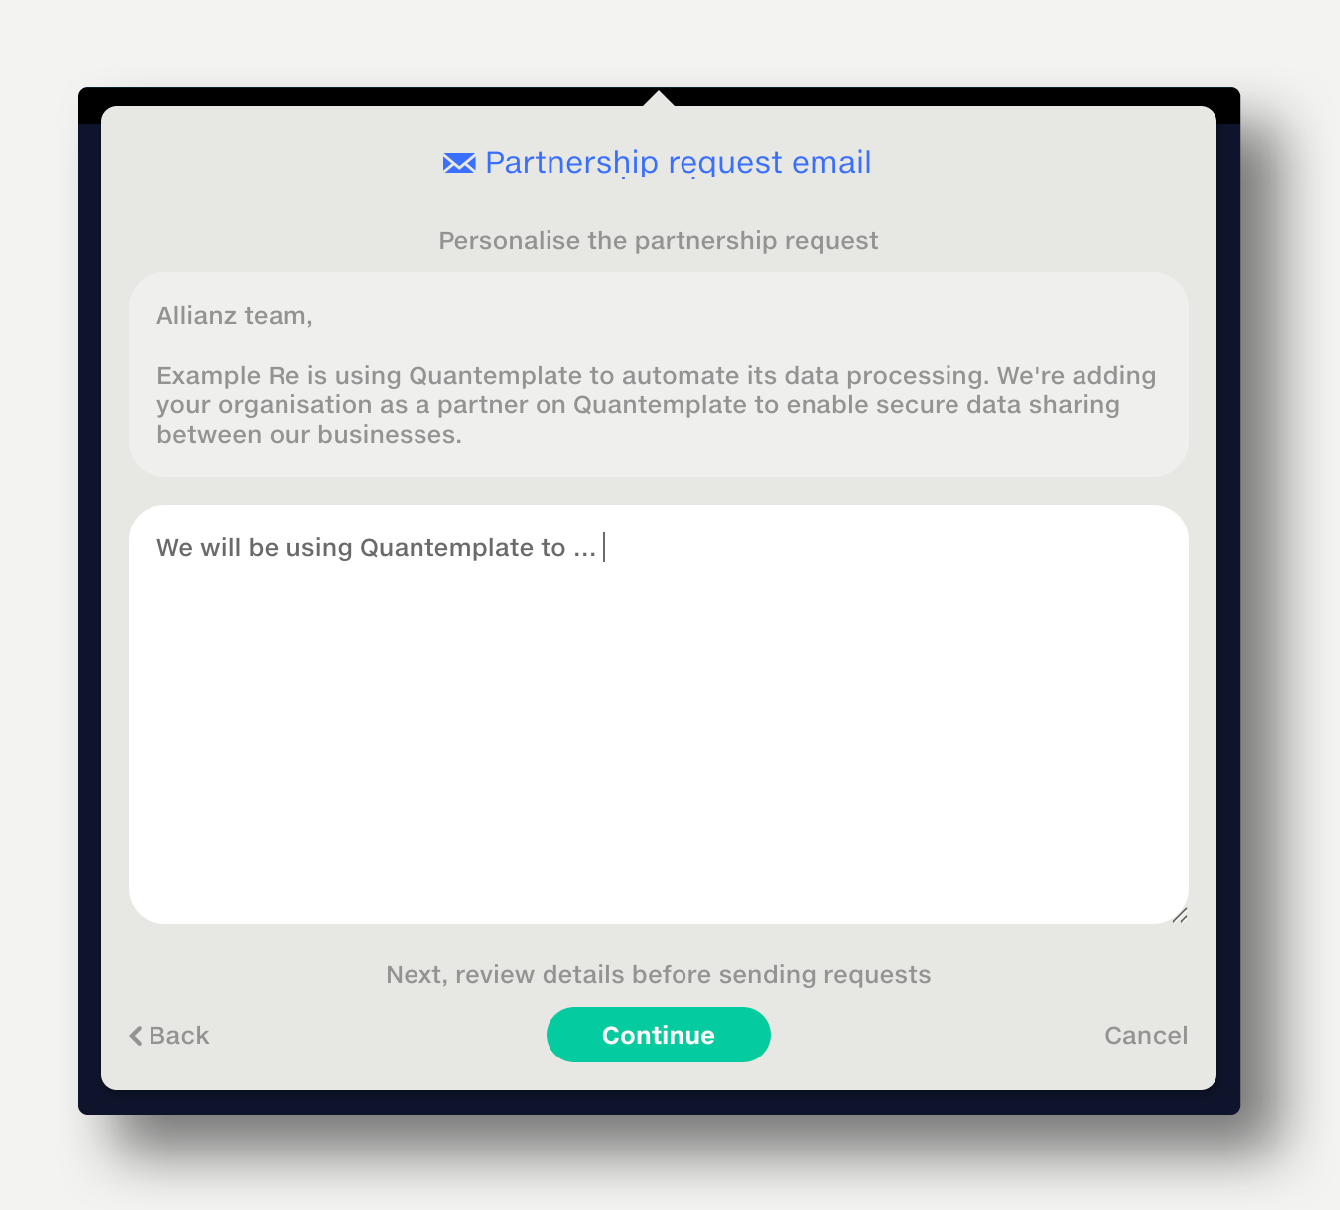
To create a partnership from the Admin tab:
If another organisation wants to form a partnership with yours, your Org Admins will receive an email notification and a notification in the Admin tab.
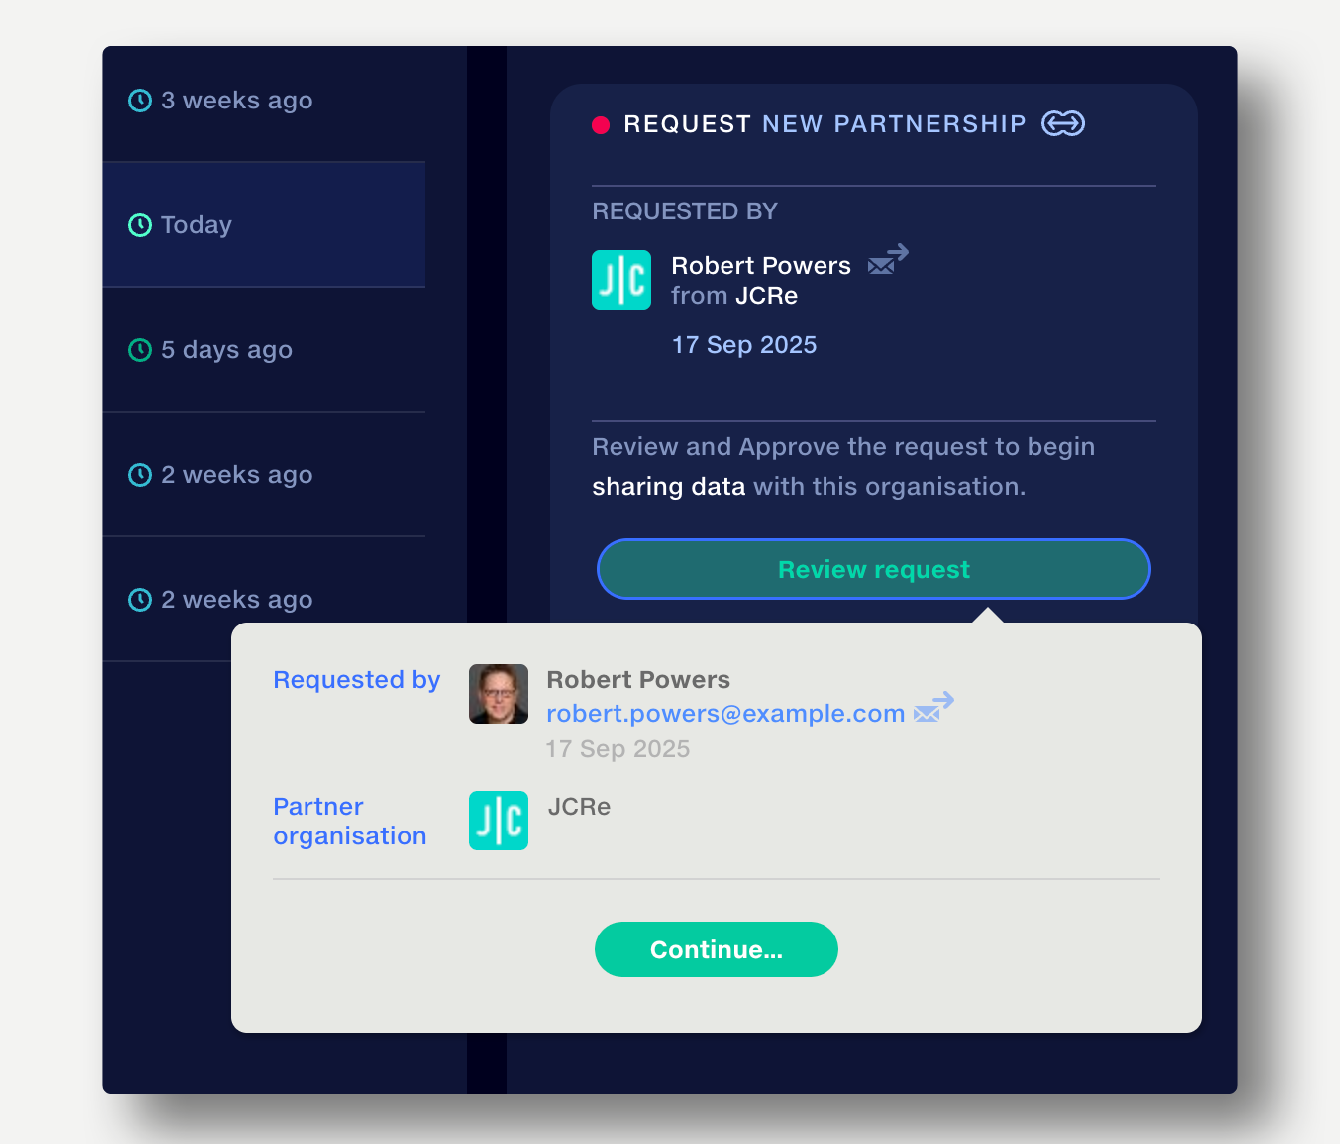
The organisation requesting a partnership appears in the Partnerships section of the Admin tab, with the status Request.
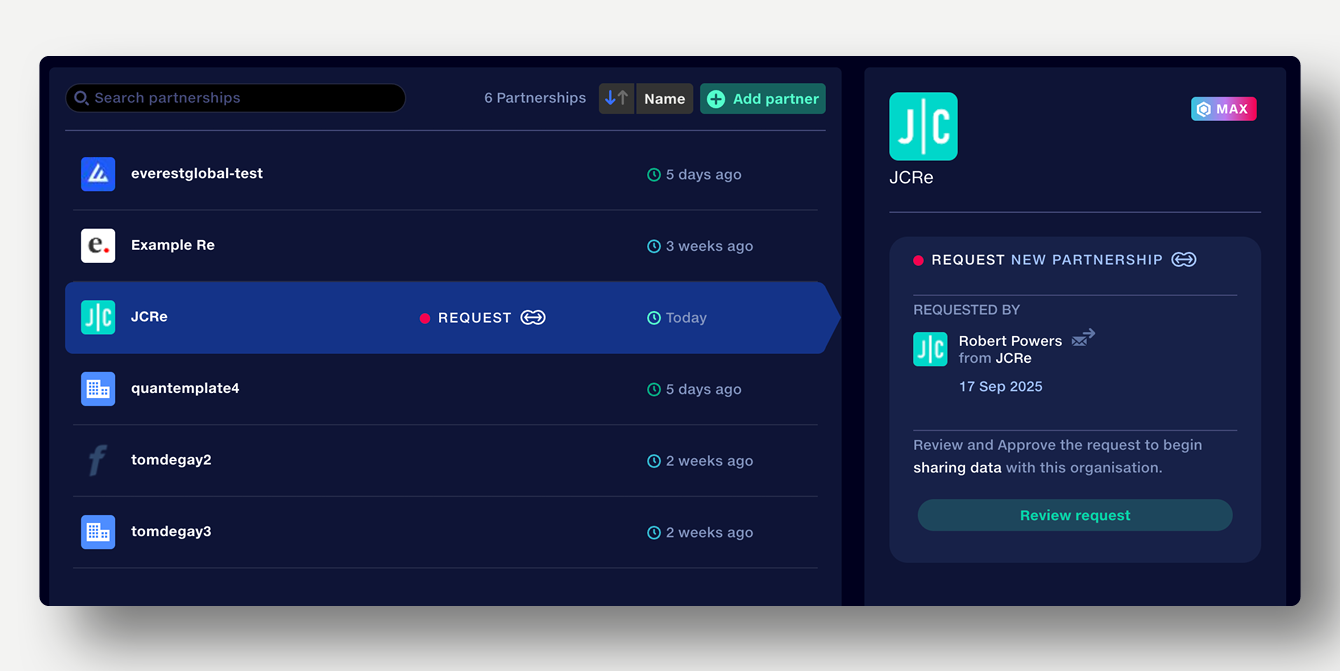
Click ‘Review request’ to see who made the request. Check that their email address matches the organisation they are from. Click ‘Continue’ to approve or reject the request.
Another organisation may ask you to add a user to your organisation, in order to exchange data via a Feed. You will receive an email notification from the requesting organisation containing the new user's email address and the Feed they need access to.
If you're happy to add this user to your organisation, follow the link in the email to open the members tab and add the requested user’s email. The Feed owner will then need to share the requested Feed with them.
Quantemplate’s APIs allow you to connect to external systems for automated data ingress and egress.
APIs are available to Max plan subscribers.
To enable API access, contact support@quantemplate.com.
If your organisation has API access enabled, click the API entry in the sidebar to view your organisation’s API Client ID. Your API Client Secret was given when API access was enabled; it cannot be shared.

Schedules are used to automate the creation of submissions and the sending of submission request emails.
Schedules are created and managed by Org Admins and can be applied to multiple feeds by the feed owner. When a schedule is applied to a feed, new submissions will be created according to the frequency set in the schedule. Data request emails will be sent to the users listed in the default submitters popup.
Schedules can contain a deadline, allowing a submission to be marked as overdue.
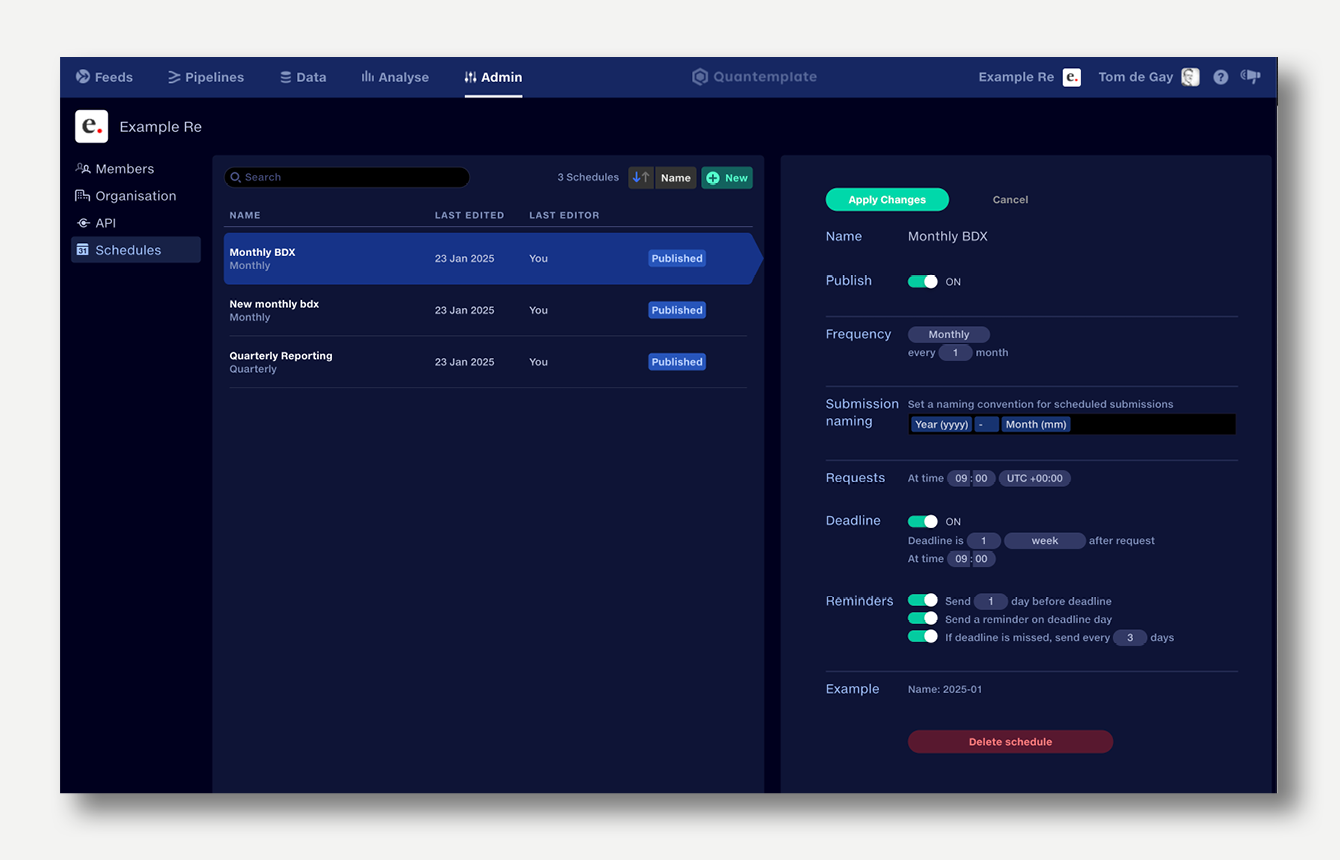
To create a schedule, navigate to the Admin tab:
Parameter |
Description |
Name |
Name the schedule to allow it to be identified in feeds. |
Publish |
When toggled ON the schedule is made available to the whole organisation and can be used in feeds.
When toggled OFF the schedule is in draft form and can only be accessed via the Admin panel. |
Frequency |
Set the frequency of requests, e.g. monthly every 1 month, weekly every 2 weeks. |
Submission naming |
Create a naming convention for submissions utilising date components, separators and custom text,
e.g. ‘yyyy-mm’. |
Requests |
Set the time of day the request is issued. The date of first request will be set in the feed. |
Deadline |
Set the deadline for submission to a time after the request. |
Reminders |
If a deadline has been set, define when reminder emails are sent, both before and after the deadline.
If the submission is complete, no reminders will be sent. |
Example |
An example of the submission naming. |
To use a schedule in a feed, see Schedule submissions.