

Feeds workspace
Schedules
About schedules
Schedules are used to automate the creation of submissions and the sending of submission request emails.
Schedules are created and managed by Org Admins and can be applied to multiple feeds by the feed owner. When a schedule is applied to a feed, new submissions will be created according to the frequency set in the schedule. Data request emails will be sent to the users listed in the default submitters popup.
Schedules can contain a deadline, allowing a submission to be marked as overdue.
Aspects of schedules such as overdue status, period start date, etc can be written to a pipeline via the Append Metadata operation.
Creating and using schedules
Schedules are created and edited by Org Admins in the Admin tab. Any edits made to a schedule will be applied to all feeds using that schedule.
Create a schedule
To create a schedule, navigate to the Admin tab:
- Navigate to the ‘Schedules’ tab on the left.
- Click the ‘New schedule’ button.
- Create a name for the schedule.
- Define the schedule parameters (frequency, naming convention, deadline, etc.)
- If the schedule is ready to use, set ‘Publish’ to ON.
- Click ‘Save’ to apply the changes.
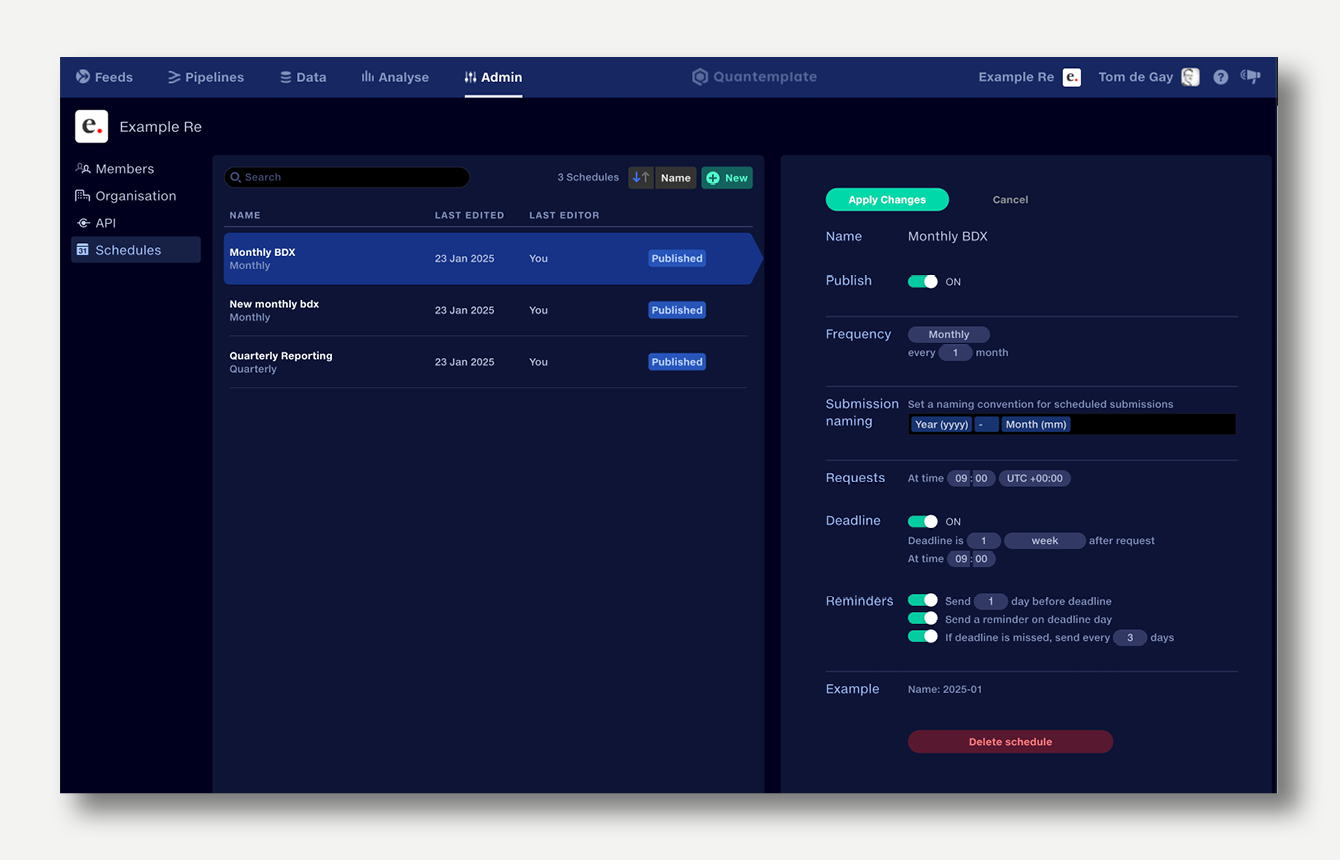
Schedule parameters
Parameter |
Description |
|---|---|
Name |
Name the schedule to allow it to be identified in feeds |
Publish |
When toggled ON the schedule is made available to the whole organisation and can be used in feeds.
When toggled OFF the schedule is in draft form and can only be accessed via the Admin panel |
Frequency |
Set the frequency of requests, e.g. monthly every 1 month, weekly every 2 weeks. |
Submission naming |
Create a naming convention for submissions utilising date components, separators and custom text,
e.g. ‘yyyy-mm’ |
Requests |
Set the time of day the request is issued. The date of first request will be set in the feed. |
Deadline |
Set the deadline for submission to a time after the request. |
Reminders |
If a deadline has been set, define when reminder emails are sent, both before and after the deadline.
If the submission is complete, no reminders will be sent. |
Example |
An example of the submission naming |
Use a schedule
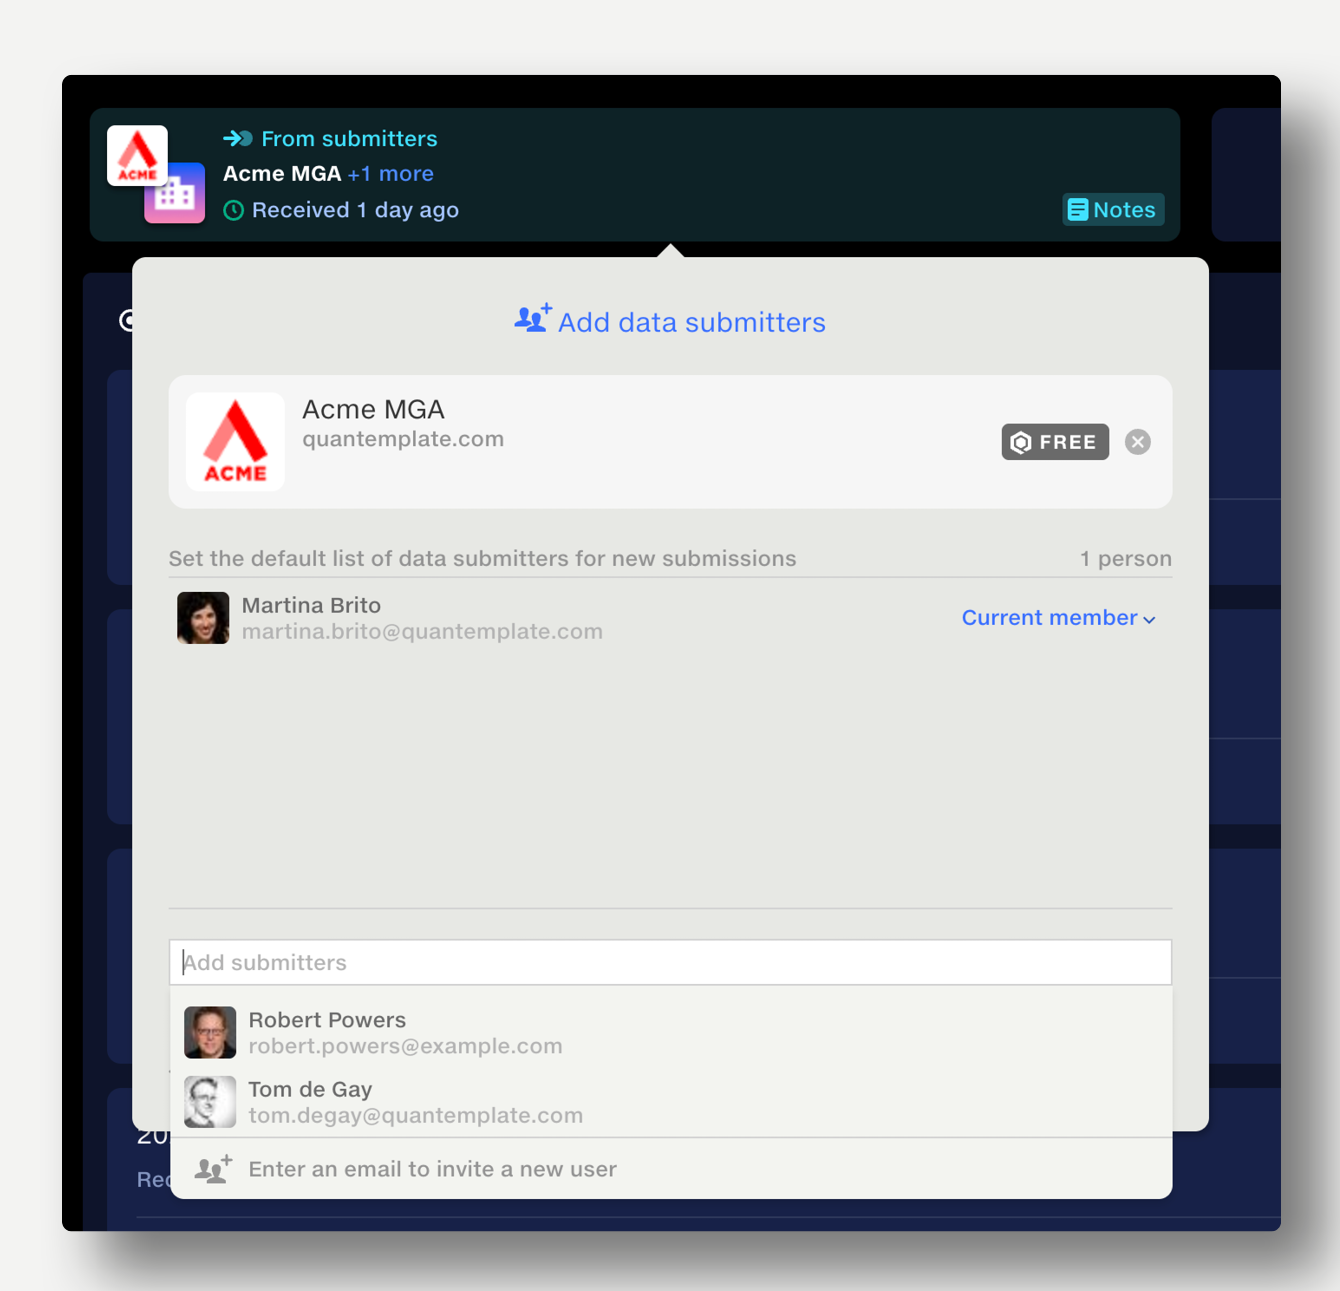
To use a schedule in a feed, first set the list of submitters:
- Click the partner logo in the top bar of the feed.
- Select the users who will receive submission requests. Currently, this is restricted to users within your own organisation.
- Add notes to personalise or contextualise the submission request emails. These will be repeated for each submission.
- Click ‘Apply’ to apply the changes.
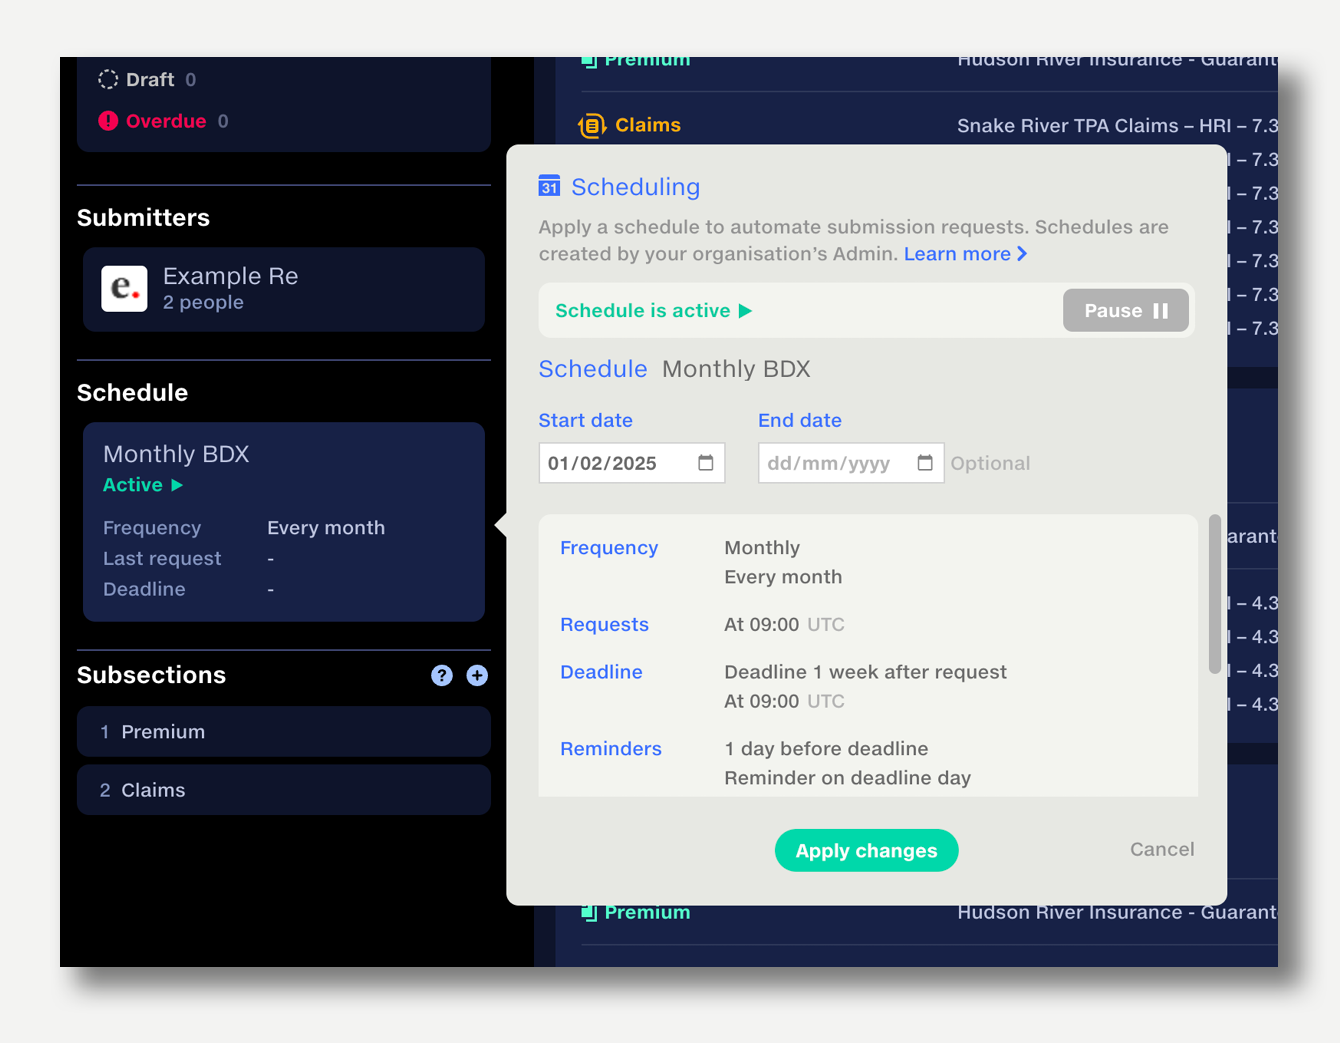
Next select the schedule:
- Click the schedule area in the sidebar.
- Select a schedule from the drop-down list.
- Select a start date for the schedule, to define when its first period will start.
- Optionally, select an end date for the schedule. After this date, no notifications will be sent.
- Click ‘Apply Changes’ to apply the changes to the schedule selection and start date.
- Click ‘Activate’ to make the schedule active. A paused schedule will not create submissions or send notifications.
About paused schedules
Schedules can be paused to temporarily stop the creation of submissions and their associated notifications. Only feed owners can pause a schedule.
When a document is duplicated or archived its schedule is paused.